There is something magical about homemade vanilla ice cream on a warm summer afternoon. It is one of those timeless desserts that brings families together, creates happy memories, and turns an ordinary day into something special. For parents looking for a dessert that children genuinely love, homemade vanilla ice cream remains one of the best options. Its creamy texture, rich vanilla flavor, and refreshing coolness make it a favorite among kids of all ages.
Unlike many store-bought ice creams that contain long lists of preservatives, artificial flavors, and stabilizers, homemade vanilla ice cream gives you complete control over the ingredients. You know exactly what goes into every scoop, making it a wonderful choice for families who want a fresher and more wholesome dessert experience. Even better, the recipe is surprisingly simple and requires only a handful of basic ingredients that many families already have in their kitchens.
Whether you’re planning a backyard barbecue, a family movie night, a birthday celebration, or simply searching for a fun summer treat, homemade vanilla ice cream delivers both flavor and nostalgia. The beauty of this recipe lies in its simplicity. While vanilla may sound basic, a well-made vanilla ice cream showcases the perfect balance of creaminess, sweetness, and aromatic vanilla flavor that can rival even the finest ice cream shops.
Why Homemade Vanilla Ice Cream Is the Perfect Family Dessert
Many parents assume that making ice cream at home is difficult or time-consuming. The truth is quite the opposite. Once you understand the process, homemade vanilla ice cream becomes one of the easiest desserts to prepare ahead of time.
One of the biggest advantages is customization. You can adjust the sweetness, use higher-quality ingredients, and even create different variations based on your family’s preferences. Some children enjoy extra vanilla flavor, while others love mix-ins such as chocolate chips or cookie pieces. Starting with a classic vanilla base gives you endless possibilities.
Another reason parents love homemade ice cream is the experience itself. Making ice cream can become a fun family activity. Children enjoy helping measure ingredients, watching the mixture come together, and eagerly waiting for the final product to freeze. It transforms dessert-making from a chore into a memorable family event.
Additionally, homemade vanilla ice cream pairs beautifully with countless summer desserts. From fresh fruit and brownies to cakes and pies, it complements nearly every sweet treat. Having a batch ready in the freezer means you’re always prepared when dessert cravings strike.
The Secret Behind Truly Amazing Vanilla Ice Cream
Many people believe that the secret to great vanilla ice cream is simply adding more vanilla extract. While vanilla certainly plays an important role, the real secret lies in the balance of ingredients and proper technique.
Premium vanilla ice cream starts with quality dairy. Heavy cream provides richness and smoothness, while whole milk contributes a lighter texture that prevents the dessert from becoming overly heavy. The combination creates a luxurious mouthfeel that melts beautifully on the tongue.
The second secret is patience. Rushing the chilling and freezing process can negatively affect texture. Properly chilling the base before churning allows flavors to develop and helps create smaller ice crystals, resulting in smoother ice cream.
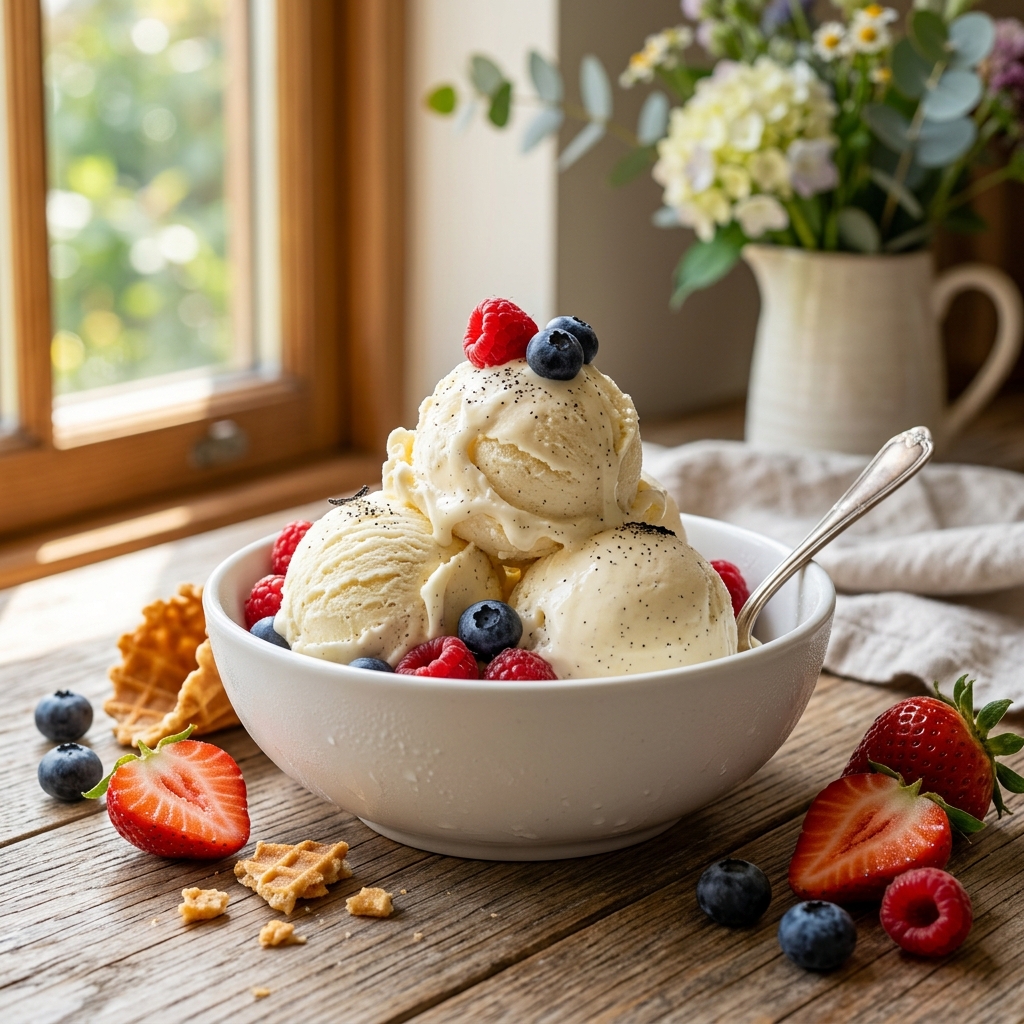
Finally, quality vanilla makes a noticeable difference. Pure vanilla extract or real vanilla beans offer a depth of flavor that artificial vanilla simply cannot replicate. The tiny specks from vanilla beans not only look beautiful but also add an authentic gourmet touch that elevates homemade ice cream to another level.
Ingredients for Homemade Vanilla Ice Cream
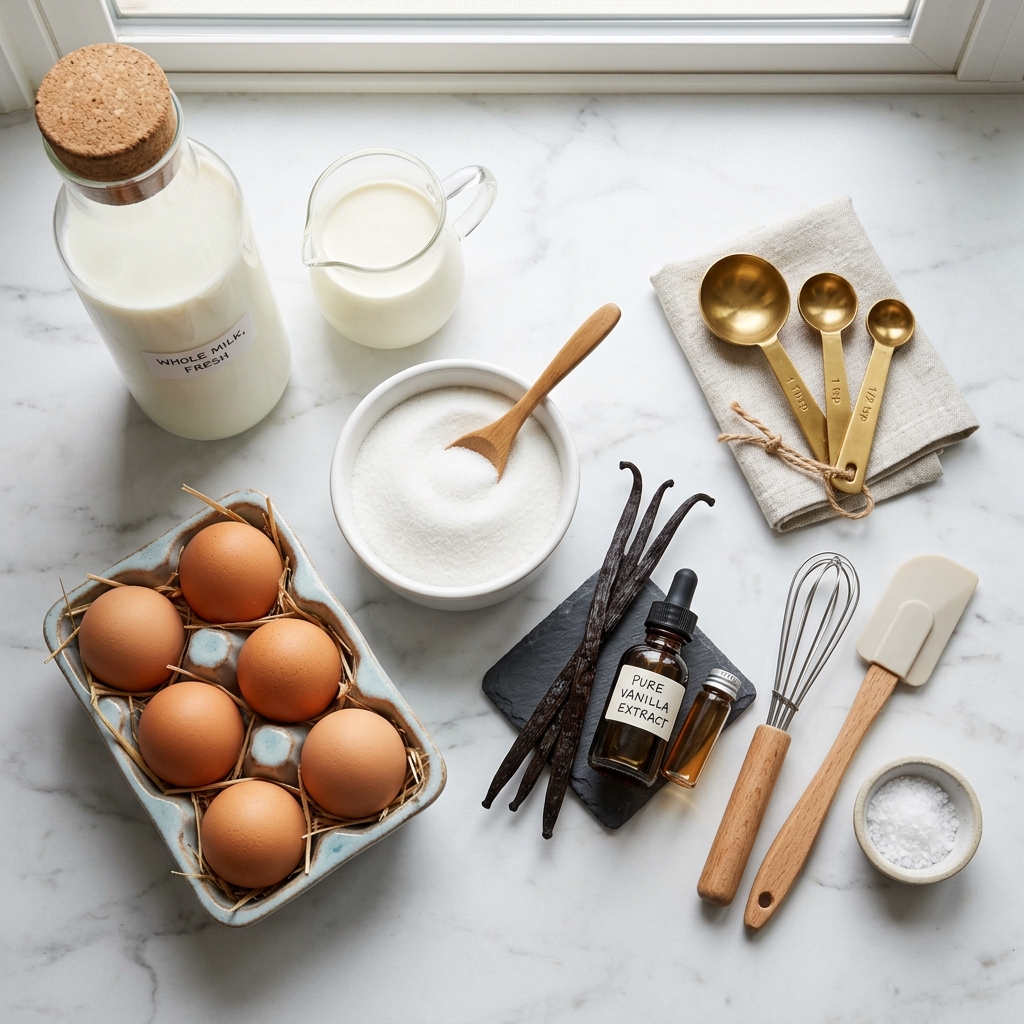
The beauty of this recipe is that it relies on simple ingredients working together to create something extraordinary.
Heavy Cream
Heavy cream serves as the foundation of rich, creamy ice cream. Its higher fat content contributes to a smooth texture and helps prevent icy crystals from forming.
Amount: 2 cups
Whole Milk
Whole milk balances the richness of the cream while maintaining a smooth consistency.
Amount: 2 cups
Granulated Sugar
Sugar sweetens the ice cream and plays an important role in texture by helping keep the mixture soft and scoopable.
Amount: ¾ cup
Egg Yolks
Egg yolks create a custard-style ice cream with exceptional richness and creaminess.
Amount: 5 large egg yolks
Pure Vanilla Extract
Pure vanilla extract provides the classic flavor that defines this dessert.
Amount: 2 tablespoons
Vanilla Bean (Optional but Recommended)
A vanilla bean adds an intense vanilla flavor and beautiful specks throughout the ice cream.
Amount: 1 vanilla bean, split and scraped
Salt
A small amount of salt enhances sweetness and balances the flavors.
Amount: ¼ teaspoon
Ingredient Tips for the Best Results
Choose High-Quality Vanilla
Since vanilla is the star ingredient, quality matters. Pure vanilla extract delivers a richer and more natural flavor compared to imitation vanilla.
Use Full-Fat Dairy
Low-fat dairy products may seem healthier, but they can produce a less creamy texture. For truly luxurious ice cream, full-fat ingredients are worth using.
Fresh Ingredients Matter
Fresh cream, milk, and eggs contribute significantly to flavor and texture. Whenever possible, use the freshest ingredients available.
Consider Vanilla Bean Paste
If vanilla beans are unavailable, vanilla bean paste can be an excellent substitute. It offers concentrated flavor and attractive vanilla specks.
Step-by-Step Preparation Guide
Step 1: Prepare the Custard Base
In a medium saucepan, combine the heavy cream, whole milk, and half of the sugar. If using a vanilla bean, add both the seeds and the pod to the mixture.
Place the saucepan over medium heat and stir occasionally until the mixture becomes hot but does not boil. Heating the dairy gently helps infuse the vanilla flavor throughout the mixture.
Step 2: Whisk the Egg Yolks
While the dairy mixture heats, place the egg yolks and remaining sugar into a mixing bowl.
Whisk continuously until the mixture becomes pale yellow and slightly thickened. This process helps create a smooth custard and ensures the sugar dissolves properly.
Step 3: Temper the Eggs
This step is critical for achieving a silky texture.
Slowly pour a small amount of the hot cream mixture into the egg yolks while whisking constantly. Continue adding the warm liquid gradually.
Tempering gently raises the temperature of the eggs, preventing them from scrambling when combined with the hot dairy.
Step 4: Cook the Custard
Return the tempered egg mixture to the saucepan.
Cook over medium-low heat while stirring constantly with a wooden spoon or silicone spatula.
Continue stirring until the custard thickens enough to coat the back of a spoon. When you run your finger through the coating, it should leave a clean line.
Avoid boiling the mixture, as excessive heat can cause the eggs to curdle.
Step 5: Strain and Cool
Remove the saucepan from the heat.
Pour the custard through a fine-mesh strainer into a clean bowl to remove any small bits of cooked egg.
Add the vanilla extract and salt, stirring until fully incorporated.
Allow the mixture to cool slightly before covering and transferring it to the refrigerator.
Step 6: Chill Thoroughly
For the smoothest ice cream possible, chill the mixture for at least 4 hours. Overnight chilling often produces even better results because it allows the flavors to fully develop.
The colder the base is before churning, the creamier the finished ice cream will be.
Step 7: Churn the Ice Cream
Once thoroughly chilled, pour the mixture into your ice cream maker.
Follow the manufacturer’s instructions for your machine.
As the ice cream churns, air becomes incorporated into the mixture, creating the light and creamy texture that makes homemade ice cream so irresistible.
Typically, churning takes between 20 and 30 minutes, depending on the machine.
Step 8: Freeze Until Firm
After churning, the ice cream will resemble soft-serve consistency.
Transfer it to an airtight freezer-safe container.
Smooth the top, press a piece of parchment paper directly against the surface, and seal the container.
Freeze for several hours until firm enough for scooping.
Recipe Variations
One of the greatest strengths of homemade vanilla ice cream is its versatility. Once you’ve mastered the basic recipe, countless flavor possibilities become available.
Vanilla Chocolate Chip Ice Cream
Fold mini chocolate chips into the freshly churned ice cream before freezing. The combination of creamy vanilla and rich chocolate is always a family favorite.
Strawberry Vanilla Ice Cream
Mix finely chopped fresh strawberries into the churned ice cream for a fruity summer twist that children love.
Cookie Crunch Vanilla Ice Cream
Add crushed sandwich cookies or vanilla wafers for extra texture and flavor.
Honey Vanilla Ice Cream
Replace a portion of the sugar with honey to create a deeper sweetness and subtle floral notes.
Birthday Cake Vanilla Ice Cream
Stir colorful sprinkles into the ice cream before freezing for a festive dessert perfect for celebrations.
Expert Tips for Perfect Homemade Vanilla Ice Cream
Even though vanilla ice cream is one of the simplest frozen desserts, a few professional techniques can make the difference between good ice cream and exceptional ice cream.
Chill Everything Before Churning
One of the most overlooked steps in homemade ice cream making is proper chilling. Not only should the custard base be thoroughly chilled, but the ice cream maker bowl should also be completely frozen if your machine requires it. Colder ingredients freeze faster, which helps create smaller ice crystals and a smoother texture.
Don’t Rush the Custard
The custard base is the foundation of this recipe. Cooking it too quickly or over high heat can result in scrambled eggs instead of a silky mixture. Keep the heat moderate and stir constantly for the best results.
Use Real Vanilla
Since vanilla is the star flavor, this is not the place to cut corners. Pure vanilla extract, vanilla bean paste, or fresh vanilla beans will provide a rich and authentic flavor that artificial vanilla simply cannot match.
Avoid Over-Churning
While churning incorporates air and creates creaminess, over-churning can cause the texture to become grainy or buttery. Once the ice cream reaches a thick soft-serve consistency, it’s ready for the freezer.
Let It Soften Before Serving
Freshly frozen homemade ice cream is often firmer than commercial varieties because it contains fewer stabilizers. Allow the container to sit at room temperature for 5 to 10 minutes before scooping for the perfect serving texture.
Store It Properly
Pressing parchment paper or plastic wrap directly against the surface of the ice cream before sealing the container helps minimize ice crystal formation and preserves freshness.
Make Ahead Options
One reason parents love this recipe is that it can be prepared well in advance.
Prepare the Custard Early
The custard base can be made up to two days before churning. Simply keep it covered in the refrigerator until you’re ready to make the ice cream.
Freeze for Future Gatherings
The finished ice cream can be stored in the freezer for several weeks, making it an excellent dessert option for birthday parties, family cookouts, and summer gatherings.
Portion Ahead for Convenience
Consider scooping individual portions onto a parchment-lined baking sheet and freezing them before transferring them to a container. This makes serving quick and easy when children are eager for dessert.
What to Serve with Homemade Vanilla Ice Cream
One of the reasons vanilla ice cream remains a classic is its incredible versatility. It pairs beautifully with a wide range of desserts and snacks.
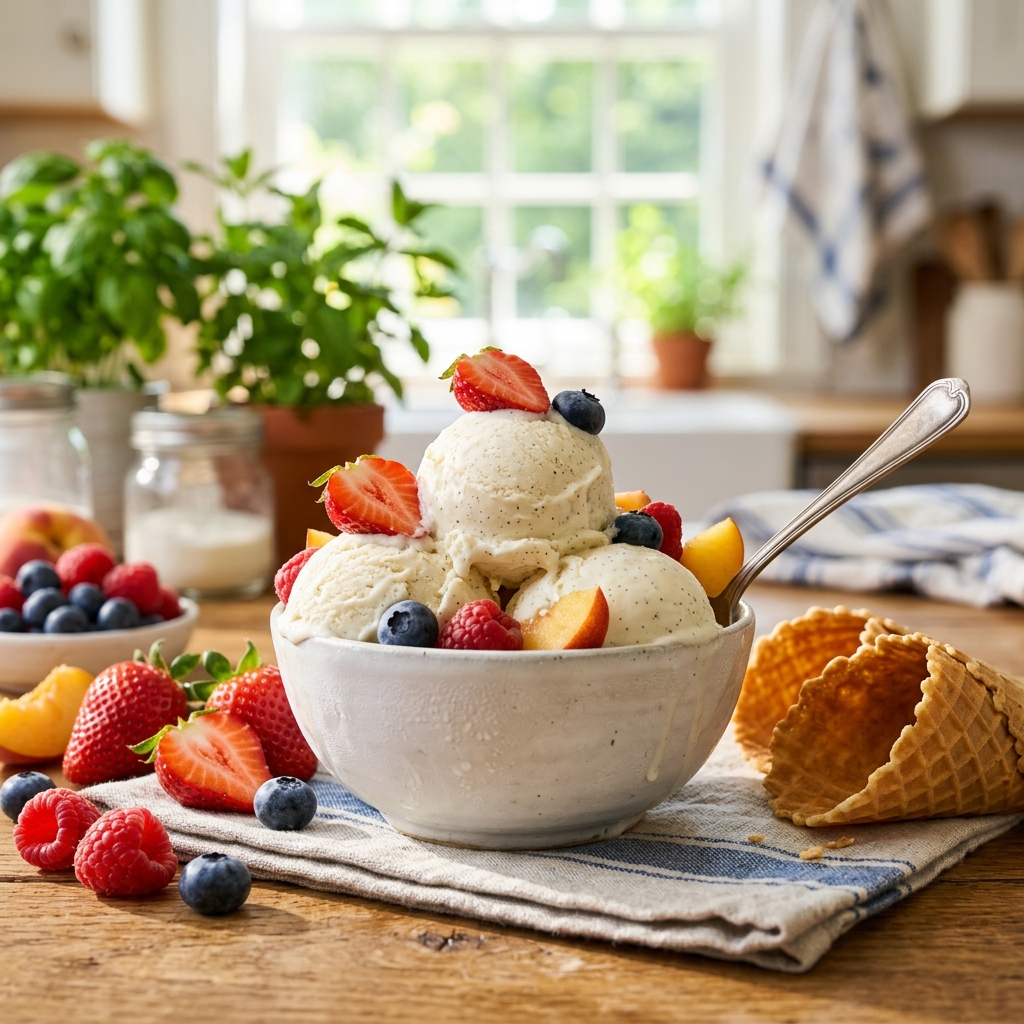
Fresh Summer Berries
Strawberries, blueberries, raspberries, and blackberries provide natural sweetness and bright flavors that complement vanilla perfectly.
Warm Brownies
Few dessert combinations are as beloved as warm chocolate brownies served with a scoop of cold vanilla ice cream.
Chocolate Chip Cookies
Freshly baked cookies and vanilla ice cream create an irresistible dessert that children and adults both enjoy.
Apple Pie
The combination of warm pie and cold ice cream has remained popular for generations because the contrast in temperatures and textures is simply delicious.
Waffles and Pancakes
A scoop of vanilla ice cream on top of waffles or pancakes transforms breakfast-inspired treats into memorable desserts.
Fresh Fruit Salad
For a lighter option, serve vanilla ice cream alongside a colorful fruit salad filled with seasonal fruits.
Cake and Cupcakes
Birthday cakes, vanilla cupcakes, chocolate cakes, and celebration desserts all pair wonderfully with homemade vanilla ice cream.
Ice Cream Sundaes
Set up a sundae bar with toppings such as chocolate sauce, caramel sauce, whipped cream, chopped nuts, fresh fruit, and colorful sprinkles for a fun family activity.
How to Store Homemade Vanilla Ice Cream
Proper storage helps preserve both flavor and texture.
Use an Airtight Container
Always store homemade ice cream in a tightly sealed freezer-safe container. Exposure to air can lead to freezer burn and unwanted ice crystals.
Cover the Surface
Placing parchment paper or plastic wrap directly against the surface creates an additional barrier against moisture and air.
Store in the Coldest Part of the Freezer
Keep the ice cream toward the back of the freezer where temperatures remain more consistent.
Avoid Frequent Temperature Changes
Repeated thawing and refreezing can damage the texture and cause large ice crystals to form.
Best Storage Time
For optimal flavor and texture, enjoy homemade vanilla ice cream within two to three weeks. While it may remain safe to eat longer, freshness is best during this period.
Frequently Asked Questions
Can I Make Vanilla Ice Cream Without an Ice Cream Maker?
Yes. While an ice cream maker produces the smoothest texture, you can freeze the chilled mixture in a shallow container and stir vigorously every 30 to 45 minutes until frozen. This helps break up ice crystals and improve creaminess.
Why Is My Homemade Ice Cream Too Hard?
Homemade ice cream often freezes harder than store-bought varieties because it contains fewer additives and stabilizers. Allow it to soften at room temperature for several minutes before scooping.
Can I Use Half-and-Half Instead of Heavy Cream?
You can, but the ice cream may be less rich and creamy. Heavy cream provides the luxurious texture that makes homemade vanilla ice cream so satisfying.
Can I Reduce the Sugar?
Sugar contributes to both sweetness and texture. Reducing it slightly is possible, but removing too much may result in harder, icier ice cream.
What’s the Best Vanilla to Use?
Pure vanilla extract, vanilla bean paste, or fresh vanilla beans all work beautifully. Fresh vanilla beans typically provide the richest flavor and most attractive appearance.
Can I Add Mix-Ins?
Absolutely. Chocolate chips, crushed cookies, candy pieces, fruit, nuts, and caramel swirls are all excellent additions. Fold them in after churning and before the final freeze.
How Long Does Homemade Vanilla Ice Cream Last?
When stored properly in an airtight container, it generally maintains its best quality for about two to three weeks.
Can Children Help Make This Recipe?
Yes. Kids can help measure ingredients, whisk mixtures, and choose toppings. Adult supervision is recommended when working around the stove and hot custard.
Why Does My Ice Cream Taste Icy?
Ice crystals usually develop when the mixture wasn’t chilled enough before churning or when the ice cream wasn’t stored properly. Thorough chilling and airtight storage help prevent this issue.
Can I Make This Recipe for Parties?
Definitely. This recipe can easily be doubled for larger gatherings, making it ideal for birthdays, cookouts, family reunions, and summer celebrations.
Conclusion
Homemade vanilla ice cream proves that sometimes the simplest recipes are the most memorable. Its creamy texture, rich vanilla flavor, and endless versatility make it a dessert that families return to year after year. For parents searching for a kid-friendly summer dessert that is both delicious and rewarding to make, this classic recipe checks every box.
Beyond the incredible taste, homemade vanilla ice cream offers something even more valuable: opportunities to create lasting family memories. Whether children are helping mix ingredients, choosing toppings, or eagerly waiting for the first scoop, the experience becomes just as enjoyable as the dessert itself.
The next time temperatures rise and your family craves something cool and refreshing, skip the freezer aisle and make your own batch from scratch. With a few simple ingredients and a little patience, you’ll be rewarded with a homemade treat that tastes better than many store-bought alternatives and brings smiles to everyone around the table.
Homemade Vanilla Ice Cream for Parents Making Kid-Friendly Summer Desserts
Ingredients
Equipment
Method
- In a medium saucepan, combine the heavy cream, whole milk, and half of the sugar. If using a vanilla bean, add both the seeds and the pod. Heat over medium heat until steaming but not boiling, stirring occasionally.
- In a separate mixing bowl, whisk together the egg yolks and remaining sugar until the mixture becomes pale yellow and slightly thickened.
- Slowly pour about 1 cup of the warm cream mixture into the egg mixture while whisking continuously. Gradually add more warm liquid until the eggs are tempered.
- Pour the tempered egg mixture back into the saucepan. Cook over medium-low heat, stirring constantly, until the custard thickens enough to coat the back of a spoon. Do not allow it to boil.
- Remove from heat and strain the custard through a fine-mesh strainer into a clean bowl. Stir in the vanilla extract and salt until fully combined.
- Cover and refrigerate the mixture for at least 4 hours or overnight until thoroughly chilled.
- Pour the chilled mixture into your ice cream maker and churn according to the manufacturer's instructions, usually 20–30 minutes.
- Transfer the churned ice cream to an airtight container. Press parchment paper directly onto the surface, cover tightly, and freeze for at least 4 hours or until firm.
- Allow the ice cream to sit at room temperature for 5–10 minutes before scooping. Serve and enjoy.
Notes
Chilling the custard overnight improves both flavor and texture.
If you prefer a lighter vanilla flavor, reduce the vanilla extract to 1½ tablespoons.
Fold in chocolate chips, crushed cookies, or fresh fruit after churning for fun variations.
Store in an airtight container in the freezer for up to 3 weeks.
If the ice cream becomes very firm, let it soften at room temperature for several minutes before scooping.
For extra-creamy results, avoid opening the freezer frequently during the final freezing stage.