Preparing for life with a new baby is an exciting journey, but it can also be overwhelming. Between setting up the nursery, attending appointments, and getting everything ready for your little one’s arrival, cooking nutritious meals often falls to the bottom of the priority list. That is why freezer-friendly meals have become a lifesaver for so many families, especially during the postpartum period.
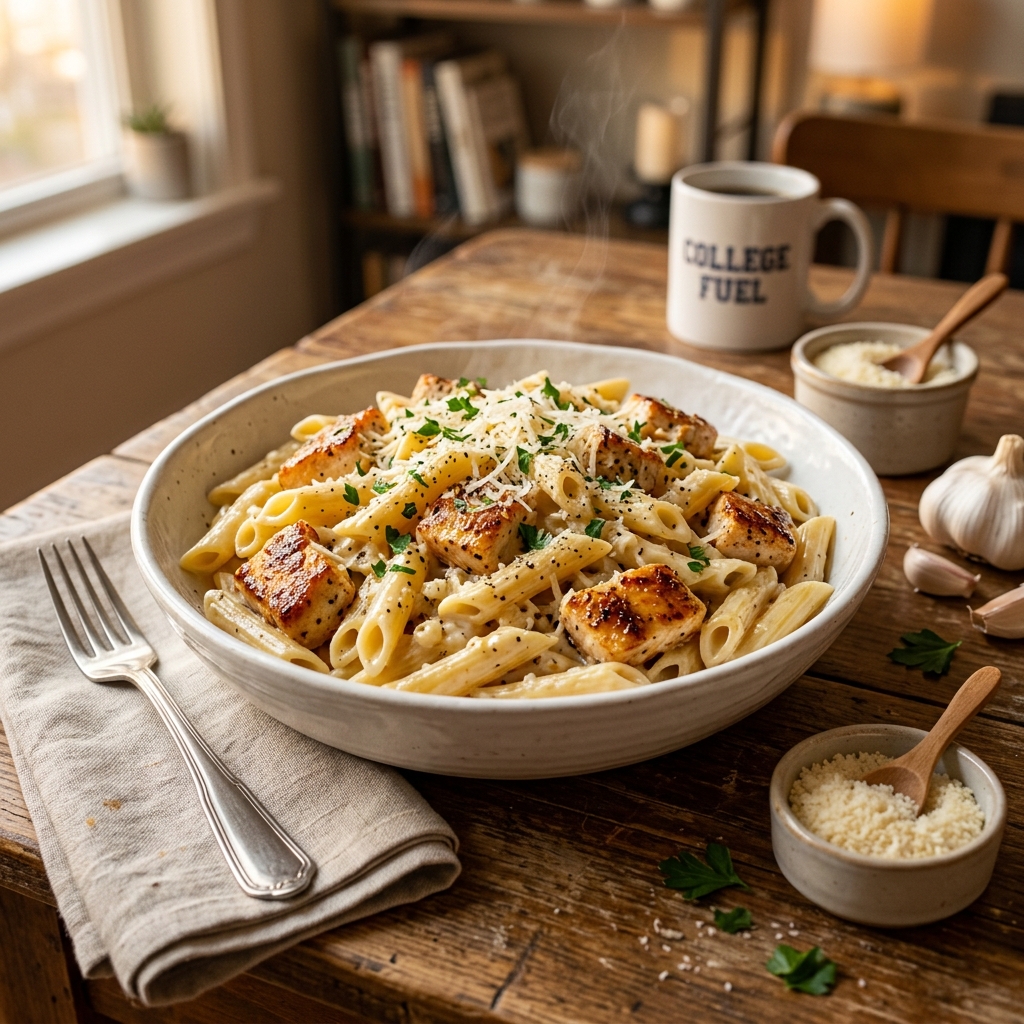
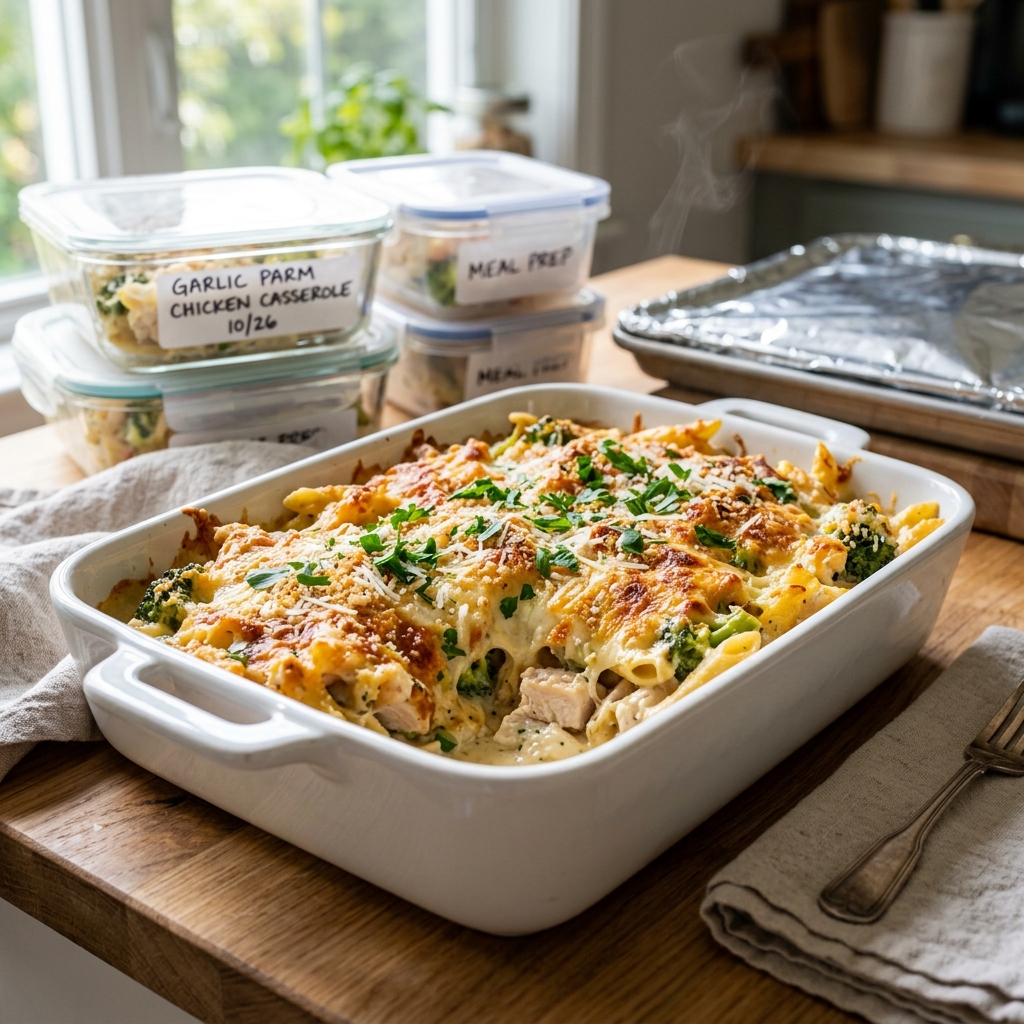
Among all the make-ahead meals you can stock in your freezer, few recipes deliver comfort, convenience, and flavor quite like a Freezer-Friendly Garlic Parmesan Chicken Casserole. Rich, creamy, cheesy, and packed with tender chicken, this casserole transforms simple pantry staples into a satisfying meal that feels homemade even on the busiest days.
What makes this recipe especially valuable for postpartum meal prep is its ability to freeze beautifully without sacrificing texture or flavor. Whether you’re preparing meals for yourself, helping a friend who recently welcomed a baby, or simply looking for easy family dinners, this casserole deserves a permanent place in your meal-prep rotation.
Imagine opening your freezer after a sleepless night, pulling out a prepared casserole, and having a warm, comforting dinner on the table with minimal effort. That’s exactly the kind of practical magic this recipe provides. It eliminates the stress of cooking while ensuring your family enjoys a hearty and nourishing meal.
Why This Casserole Is Perfect for Postpartum Meal Prep
The postpartum period is often unpredictable. Some days feel manageable, while others can be exhausting. During this season of life, meals that require little preparation become incredibly valuable.
This garlic parmesan chicken casserole checks all the right boxes:
- High in protein for recovery and energy.
- Freezer-friendly for long-term storage.
- Family-friendly and suitable for multiple age groups.
- Easy to reheat.
- Budget-friendly.
- Comforting and filling.
- Adaptable to different dietary preferences.
Many freezer meals become dry or lose their appeal after thawing. However, the creamy garlic parmesan sauce in this casserole helps maintain moisture and flavor, making it just as delicious after freezing as it is when freshly prepared.
The combination of garlic, parmesan cheese, and tender chicken creates a classic flavor profile that appeals to both adults and children. Even picky eaters often enjoy the mild, cheesy taste, making this recipe a practical choice for households with varying preferences.
The Secret Behind a Great Freezer Casserole
Not every casserole is suitable for freezing. Some ingredients separate, become watery, or lose their texture during storage. Understanding what makes a freezer meal successful can help you create better make-ahead dishes.
The secret lies in balancing moisture, protein, and dairy ingredients. This recipe utilizes a creamy garlic parmesan sauce that acts as a protective layer around the chicken and pasta. As the casserole freezes and thaws, the sauce helps prevent dryness and preserves the overall texture.
Another key factor is choosing ingredients that naturally withstand freezing. Chicken, pasta, parmesan cheese, and cream-based sauces all freeze exceptionally well when properly prepared.
This means you can confidently make multiple batches, knowing you’ll have delicious meals ready whenever you need them.
Ingredients
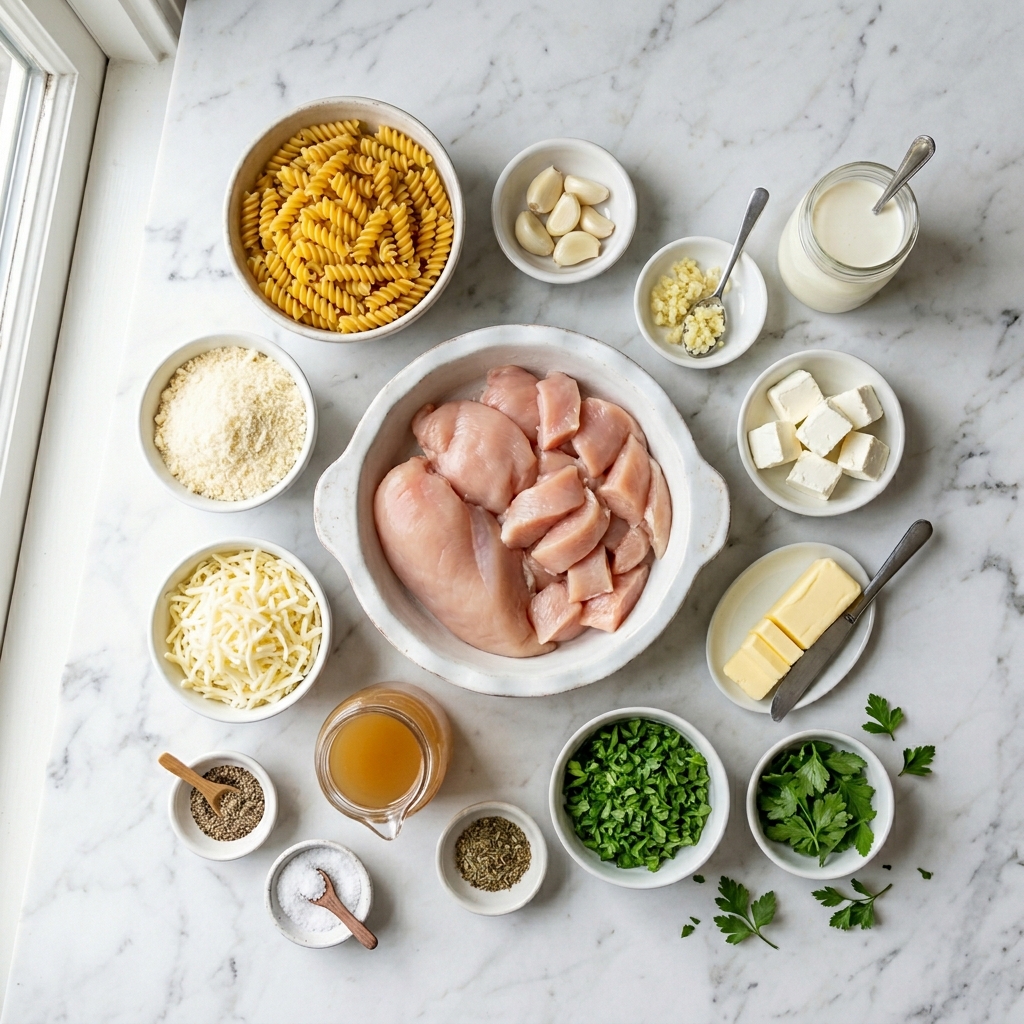
One of the best things about this casserole is that it relies on simple, accessible ingredients that work together to create incredible flavor.
For the Casserole
- 2 pounds boneless skinless chicken breasts, diced
- 12 ounces pasta (penne, rotini, or rigatoni)
- 2 tablespoons olive oil
- 4 tablespoons butter
- 6 cloves garlic, minced
- 2 cups chicken broth
- 1½ cups heavy cream
- 8 ounces cream cheese, softened
- 1½ cups freshly grated parmesan cheese
- 2 cups shredded mozzarella cheese
- 1 teaspoon Italian seasoning
- 1 teaspoon onion powder
- ½ teaspoon black pepper
- 1 teaspoon salt (or to taste)
- 2 tablespoons fresh parsley, chopped
Optional Topping
- ½ cup grated parmesan cheese
- ½ cup mozzarella cheese
- ¼ cup seasoned breadcrumbs
- 1 tablespoon melted butter
Understanding the Role of Each Ingredient
Chicken
Chicken provides the primary source of protein in this casserole. Boneless skinless chicken breasts are lean and convenient, but chicken thighs can also be used for extra richness and moisture.
Garlic
Fresh garlic is essential for creating the bold, savory flavor that defines this recipe. While garlic powder can work in a pinch, fresh garlic produces a deeper and more aromatic result.
Parmesan Cheese
Parmesan contributes a nutty, salty flavor that elevates the entire dish. Freshly grated parmesan melts more smoothly and delivers superior flavor compared to pre-shredded varieties.
Cream Cheese
Cream cheese creates the luxurious texture that makes this casserole so comforting. It helps the sauce remain creamy even after freezing and reheating.
Mozzarella Cheese
Mozzarella adds the irresistible cheesy pull that everyone loves. It also helps bind the casserole together.
Pasta
Short pasta shapes such as penne or rotini are ideal because they hold the sauce well and maintain their structure during freezing and reheating.
Chicken Broth
Chicken broth enhances the savory depth of the sauce while helping create the perfect consistency.
Italian Seasoning
This simple blend of herbs complements the garlic and parmesan beautifully without overpowering the dish.
Preparation Guide
Step 1: Prepare the Chicken
Begin by cutting the chicken into evenly sized bite-sized pieces. Uniform pieces ensure consistent cooking throughout the casserole.
Pat the chicken dry using paper towels. Removing excess moisture helps achieve better browning and improves flavor development.
Season the chicken lightly with salt, pepper, and a small pinch of Italian seasoning.
Heat olive oil in a large skillet over medium-high heat.
Add the chicken pieces and cook for approximately 5 to 7 minutes, stirring occasionally, until lightly golden on the outside.
The chicken does not need to be fully cooked at this stage because it will continue cooking later in the casserole.
Transfer the chicken to a plate and set aside.
Step 2: Cook the Pasta
Bring a large pot of salted water to a boil.
Add the pasta and cook until just under al dente. This step is extremely important for freezer casseroles.
Because the pasta will continue cooking during baking and reheating, slightly undercooking it prevents it from becoming soft or mushy later.
Drain the pasta and set it aside.
Avoid rinsing the pasta, as the natural starch helps the sauce adhere more effectively.
Step 3: Build the Garlic Parmesan Sauce
Using the same skillet used for the chicken, reduce the heat to medium.
Add the butter and allow it to melt completely.
Stir in the minced garlic and cook for approximately one minute. Be careful not to brown the garlic excessively, as this can create bitterness.
The goal is to release the garlic’s natural aroma and flavor into the butter.
Once fragrant, slowly pour in the chicken broth while stirring continuously.
Allow the broth to simmer gently for several minutes.
This process helps deglaze the pan, capturing all the flavorful bits left behind from cooking the chicken.
Step 4: Create the Creamy Base
Lower the heat to medium-low.
Add the softened cream cheese in small portions, stirring constantly until completely incorporated.
Patience is important here. Adding the cream cheese gradually helps create a smooth sauce without lumps.
Once the cream cheese has fully melted, slowly pour in the heavy cream while continuing to stir.
The sauce should begin to look silky, rich, and velvety.
Gradually add the parmesan cheese, allowing each addition to melt before adding more.
Season the sauce with:
- Italian seasoning
- Onion powder
- Salt
- Black pepper
Continue stirring until the sauce becomes smooth, creamy, and evenly seasoned.
At this stage, your kitchen will be filled with the irresistible aroma of garlic, butter, and parmesan cheese—the unmistakable sign that something delicious is on the way.
Step 5: Combine the Main Components
Return the cooked chicken to the skillet.
Add the cooked pasta and gently stir to coat every piece with the creamy garlic parmesan sauce.
Mix carefully to ensure even distribution of the chicken, pasta, and sauce.
Finally, add the shredded mozzarella cheese and fold everything together until well combined.
The casserole mixture should be creamy, rich, and generously coated with sauce without appearing overly thick or dry.
This is the point where many cooks are tempted to sample a spoonful—and for good reason. The flavors are already developing beautifully and provide a preview of the finished casserole.
Step 6: Assemble the Casserole
Lightly grease a 9×13-inch baking dish with butter or nonstick spray.
Pour the pasta and chicken mixture into the dish and spread it evenly.
If using the optional topping, combine the grated parmesan, mozzarella, breadcrumbs, and melted butter in a small bowl.
Sprinkle the topping evenly over the casserole for an extra golden, crispy finish.
At this point, you can either bake the casserole immediately or prepare it for freezing.
Step 7: Bake Until Golden and Bubbly
Preheat your oven to 375°F (190°C).
Bake the casserole uncovered for 25–30 minutes, or until the top is golden brown and the edges are bubbling.
For a deeper golden crust, broil for an additional 2–3 minutes at the end of baking.
Remove from the oven and let the casserole rest for 10 minutes before serving.
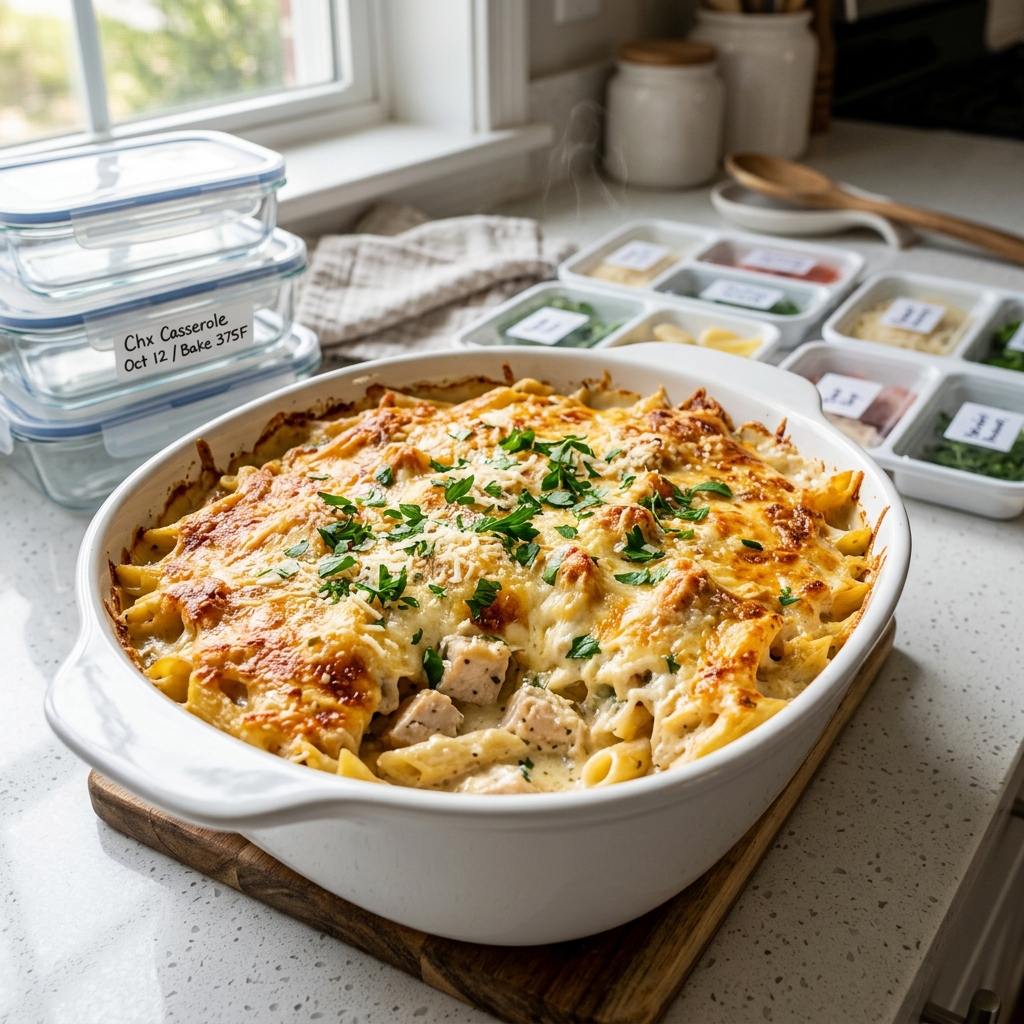
Garnish with fresh parsley for a bright, fresh finish.
The result is a creamy, cheesy casserole with tender chicken, perfectly coated pasta, and a rich garlic parmesan flavor that tastes like comfort in every bite.
How to Freeze for Postpartum Meal Prep
This recipe is designed with freezer meal prep in mind, making it ideal for postpartum recovery.
Freezing Instructions
-
Allow the assembled casserole to cool completely.
-
Wrap the baking dish tightly with plastic wrap, then cover with aluminum foil.
-
Label with the recipe name and date.
-
Freeze for up to 3 months.
Best Practices for Freezing
-
Use a freezer-safe glass or aluminum baking dish.
-
Freeze the casserole flat for easier storage.
-
For smaller households, divide the mixture into two 8×8-inch dishes before freezing.
Reheating from Frozen
-
Remove the casserole from the freezer the night before and thaw in the refrigerator.
-
Bake at 375°F (190°C) for 30–40 minutes, covered with foil for the first 20 minutes.
-
Remove the foil and bake until hot and bubbly.
If baking directly from frozen, add 20–30 extra minutes to the cooking time and keep the casserole covered for most of the bake.
Variations to Try
One of the strengths of this recipe is how adaptable it is. Here are a few delicious variations:
Spinach Garlic Parmesan Casserole
Stir in 3 cups of fresh spinach before baking for added nutrients and color.
Broccoli Chicken Casserole
Add 2 cups of steamed broccoli florets for a heartier vegetable-packed version.
Bacon Parmesan Version
Mix in 6 slices of cooked, crumbled bacon for smoky flavor and extra richness.
Low-Carb Option
Replace the pasta with cauliflower florets or zucchini noodles for a lighter casserole.
Spicy Garlic Parmesan
Add ½ teaspoon red pepper flakes to the sauce for a gentle kick of heat.
Expert Tips for the Best Casserole
-
Undercook the pasta slightly: This prevents mushy texture after baking and reheating.
-
Use freshly grated cheese: Pre-shredded cheese often contains anti-caking agents that can make the sauce grainy.
-
Soften the cream cheese first: Letting it sit at room temperature helps it blend smoothly into the sauce.
-
Don’t overbake: Bake just until bubbly and golden to keep the casserole creamy.
-
Let it rest before serving: Resting allows the sauce to thicken slightly and makes serving easier.
Make-Ahead Options
This casserole is exceptionally flexible for meal prep.
Prepare 1–2 Days Ahead
Assemble the casserole, cover it tightly, and refrigerate for up to 48 hours before baking.
Freeze Unbaked
Freeze the assembled casserole before baking for the freshest texture later.
Freeze Individual Portions
Divide the mixture into smaller freezer-safe containers for quick single-serving meals during the postpartum period.
What to Serve with Garlic Parmesan Chicken Casserole
This casserole is a complete meal on its own, but a few simple sides can make it even more satisfying:
-
Garlic bread or crusty artisan bread.
-
Simple green salad with lemon vinaigrette.
-
Roasted asparagus or green beans.
-
Steamed broccoli.
-
Caesar salad.
-
Fresh fruit salad for a lighter contrast.
For postpartum meals, pairing the casserole with easy, nutrient-rich sides keeps dinner balanced without adding extra work.
How to Store Leftovers
-
Refrigerator: Store leftovers in an airtight container for up to 4 days.
-
Freezer: Freeze cooked leftovers for up to 3 months.
-
Reheating: Warm in the microwave or oven until heated through. Add a splash of milk or broth if the sauce has thickened too much.
Frequently Asked Questions
1. Can I use rotisserie chicken instead of raw chicken?
Yes. Shred about 4 cups of rotisserie chicken and stir it into the sauce with the pasta. This saves time and adds extra flavor.
2. Will the sauce separate after freezing?
The combination of cream cheese, heavy cream, and parmesan helps stabilize the sauce, so it reheats creamy and smooth when thawed properly.
3. Can I make this casserole gluten-free?
Absolutely. Use your favorite gluten-free pasta and gluten-free breadcrumbs for the topping.
4. Is this recipe suitable for breastfeeding mothers?
Yes. It contains protein, calcium, and satisfying calories that many postpartum parents find helpful during recovery and breastfeeding. As always, adjust ingredients based on personal dietary needs or medical advice.
5. Can I freeze the casserole after baking?
Yes. Let it cool completely, then wrap tightly and freeze. Reheat covered at 350°F (175°C) until hot throughout.
Freezer-Friendly Garlic Parmesan Chicken Casserole for Postpartum Freezer Meal Prep
Ingredients
Equipment
Method
- Cut chicken into bite-sized pieces.
- Season lightly with salt, pepper, and a pinch of Italian seasoning.
- Heat olive oil in a large skillet over medium-high heat.
- Cook chicken for 5–7 minutes until lightly browned.
- Remove from skillet and set aside.
- Bring a large pot of salted water to a boil.
- Cook pasta until just under al dente.
- Drain and set aside without rinsing.
- In the same skillet, melt butter over medium heat.
- Add minced garlic and cook for 1 minute until fragrant.
- Pour in chicken broth and simmer for 2–3 minutes.
- Add softened cream cheese gradually, stirring until smooth.
- Slowly stir in heavy cream.
- Add parmesan cheese and stir until melted.
- Season with Italian seasoning, onion powder, salt, and pepper.
- Return chicken to the skillet.
- Add cooked pasta and stir well.
- Fold in mozzarella cheese until evenly distributed.
- Mix until all ingredients are coated with sauce.
- Grease a 9x13-inch casserole dish.
- Transfer the mixture into the dish and spread evenly.
- Mix topping ingredients together if using.
- Sprinkle topping evenly over the casserole.
- Preheat oven to 375°F (190°C).
- Bake uncovered for 25–30 minutes.
- Bake until golden brown and bubbling around the edges.
- Let rest for 10 minutes before serving.
- Garnish with chopped parsley and enjoy.
- Allow casserole to cool completely.
- Cover tightly with plastic wrap and aluminum foil.
- Label and freeze for up to 3 months.
- Thaw overnight in the refrigerator before baking or reheating.
Notes
Freshly grated parmesan provides the best flavor and melting quality.
Chicken thighs can be substituted for chicken breasts for a richer casserole.
Add steamed broccoli, spinach, or peas for extra vegetables.
For a crispier topping, broil for 2–3 minutes before serving.
Store leftovers in the refrigerator for up to 4 days.
Freeze individual portions for convenient postpartum meals and quick lunches.
This casserole can be assembled up to 48 hours in advance and refrigerated before baking.