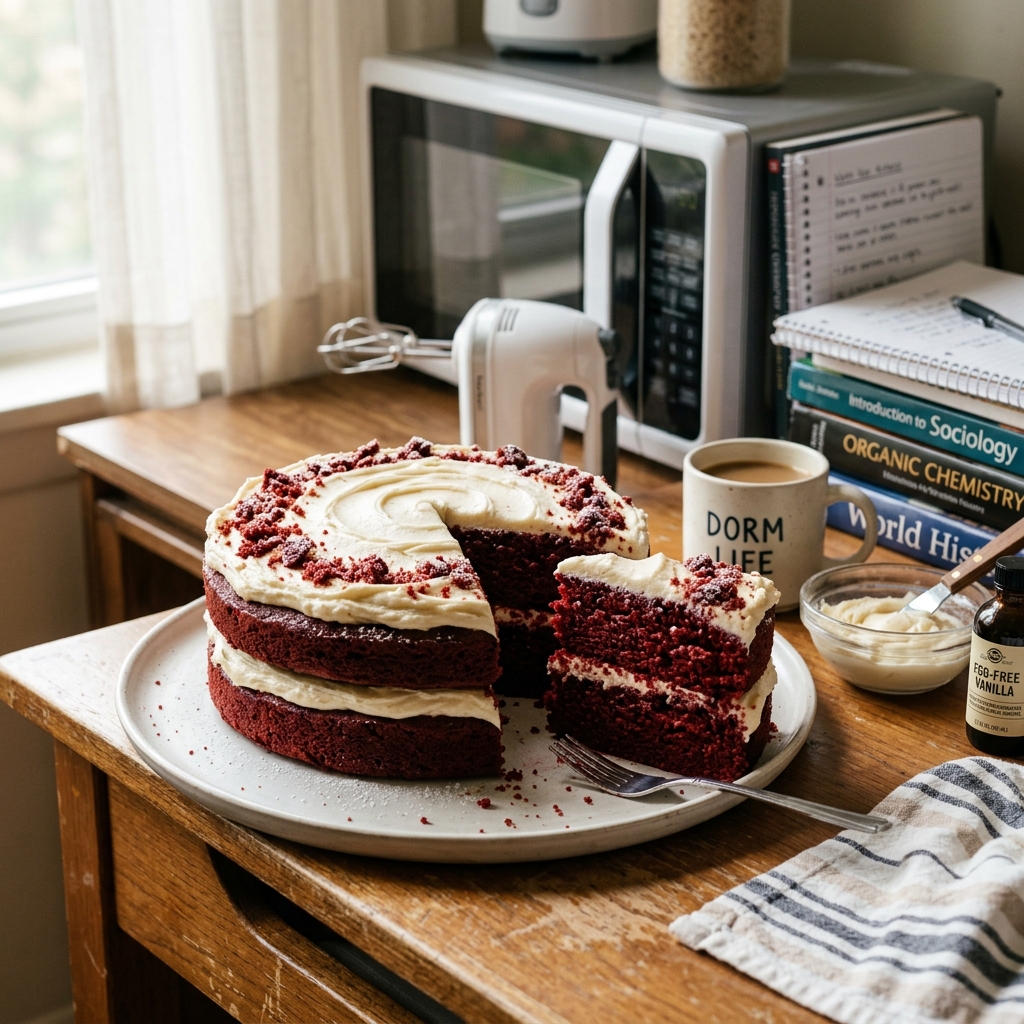
Living in an apartment often means making peace with limited kitchen space. For many renters, one of the biggest sacrifices is not having access to a traditional oven. That can make baking seem impossible, especially when you’re craving something special like a rich, velvety homemade cake. Fortunately, modern kitchen appliances have changed the game, and the humble air fryer has become one of the most versatile tools for home cooks and dessert lovers alike.
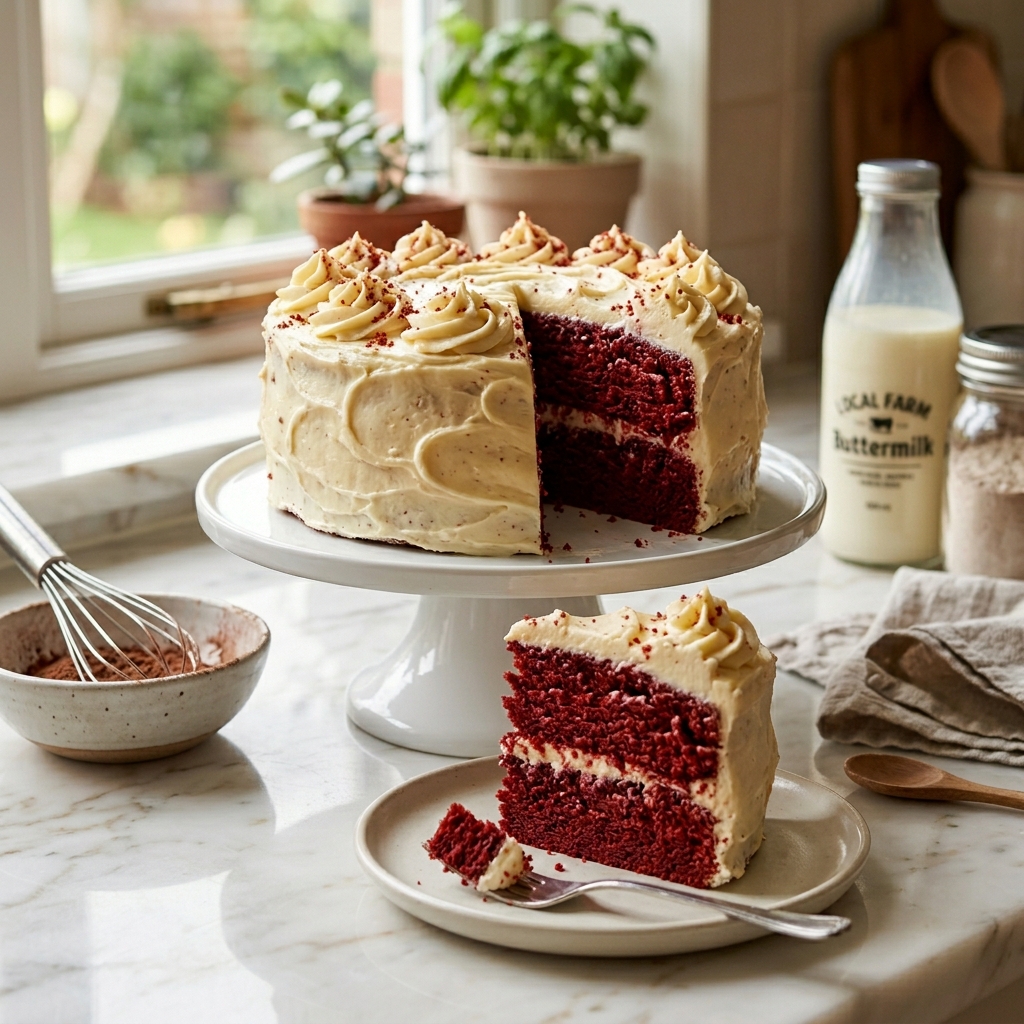
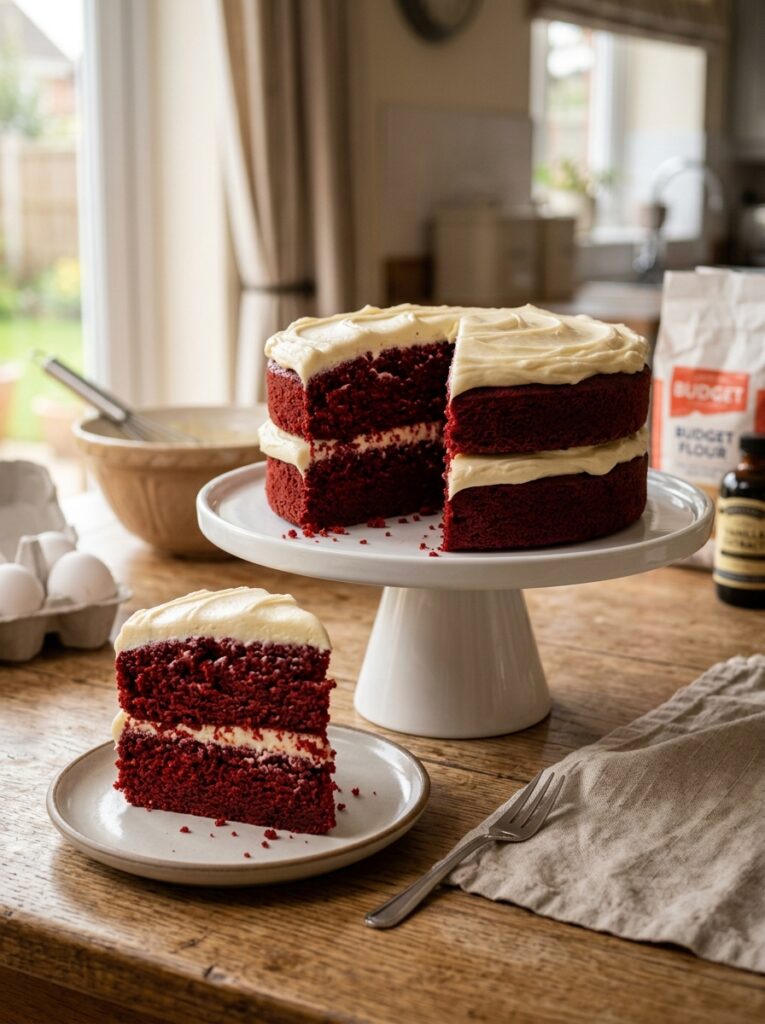
If you’ve ever thought that making a beautiful red velvet cake required a large kitchen, expensive baking equipment, or a full-sized oven, this recipe is about to prove otherwise. With just a few simple ingredients and an air fryer, you can create a soft, moist, bakery-style red velvet cake that looks impressive and tastes even better. Whether you’re celebrating a birthday, surprising a loved one, or simply treating yourself after a long day, this recipe delivers all the classic flavors without the need for complicated equipment.
Red velvet cake has remained one of the world’s favorite desserts for decades. Its vibrant red color, subtle cocoa flavor, and smooth cream cheese frosting make it both elegant and comforting. This air fryer version preserves everything people love about the classic recipe while making it accessible to students, apartment renters, first-time bakers, and anyone working with a small kitchen.
The best part? You don’t need professional baking skills. This recipe is designed to be forgiving, easy to follow, and incredibly rewarding. Even if you’ve never baked a cake before, you’ll be surprised at how simple the process can be.
Why Bake Red Velvet Cake in an Air Fryer?
Many people associate air fryers with crispy fries and chicken wings, but these compact appliances are actually miniature convection ovens. They circulate hot air evenly around food, creating a stable baking environment that’s ideal for cakes, muffins, brownies, and even cheesecakes.
For apartment renters, this offers several advantages.
First, an air fryer heats up much faster than a conventional oven. There’s no long waiting period before baking, which saves both time and electricity.
Second, air fryers don’t generate as much heat in your kitchen. During hot weather, baking with a full-sized oven can make a small apartment feel uncomfortable, while an air fryer keeps things cool and manageable.
Third, cleanup is remarkably simple. Most air fryer baskets and baking accessories have non-stick surfaces, reducing the amount of scrubbing required afterward.
Most importantly, baking a cake in an air fryer allows almost anyone to enjoy homemade desserts, regardless of their living situation. You don’t have to wait until you own a bigger home or invest in expensive appliances. Great baking can happen right where you are.
The Secret Behind a Perfect Red Velvet Cake
One of the biggest misconceptions about red velvet cake is that it’s simply chocolate cake dyed red. In reality, its flavor profile is much more delicate and unique.
Traditional red velvet cake combines a small amount of cocoa powder with buttermilk and a touch of vinegar. The buttermilk provides richness and tenderness, while the vinegar reacts with the baking soda to create a lighter, fluffier texture. Together, these ingredients produce a subtle tanginess that perfectly balances the sweetness of the frosting.
The iconic red color originally developed naturally from the reaction between cocoa powder and acidic ingredients. Modern recipes often include red food coloring to create the bright appearance people expect today.
Another important element is the cream cheese frosting. Its smooth, slightly tangy flavor complements the cake beautifully, preventing the dessert from becoming overly sweet.
When these components come together properly, the result is a cake that feels luxurious, moist, and surprisingly light.
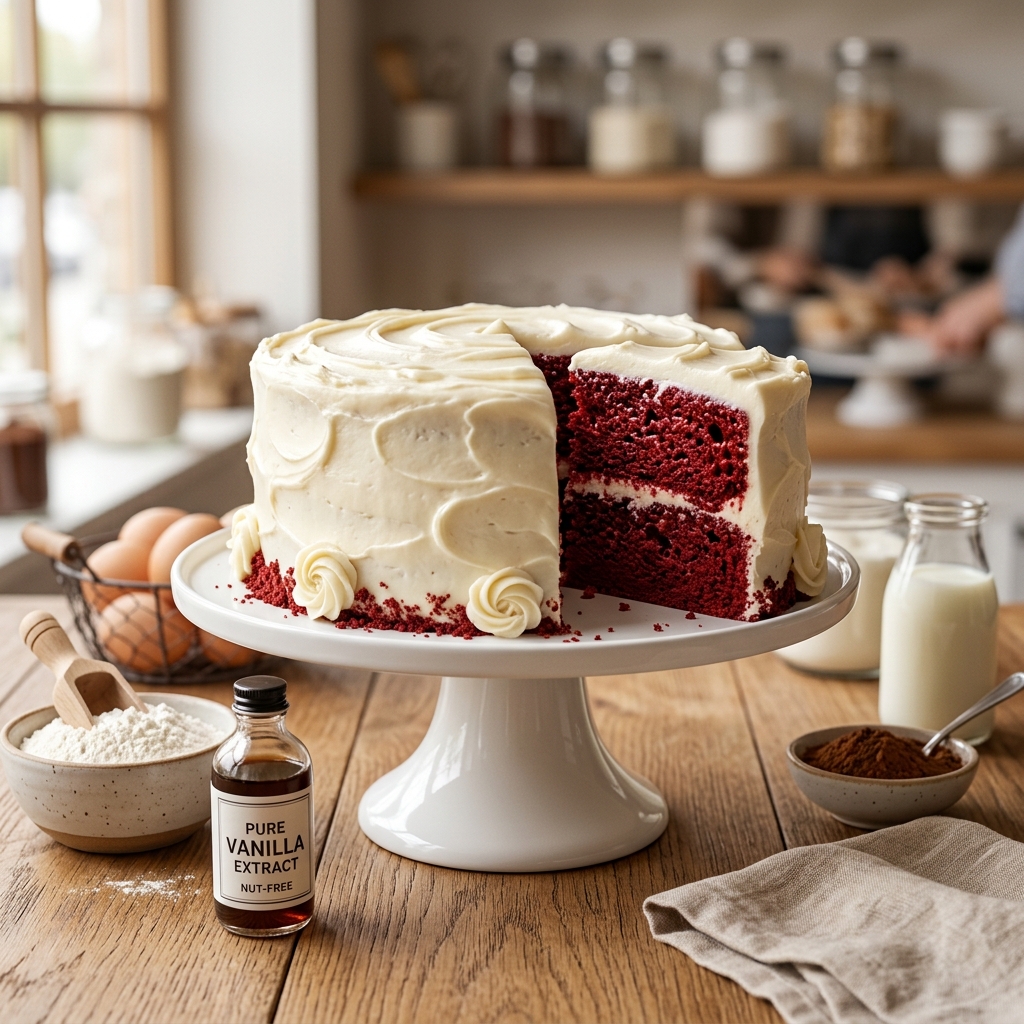
Ingredients
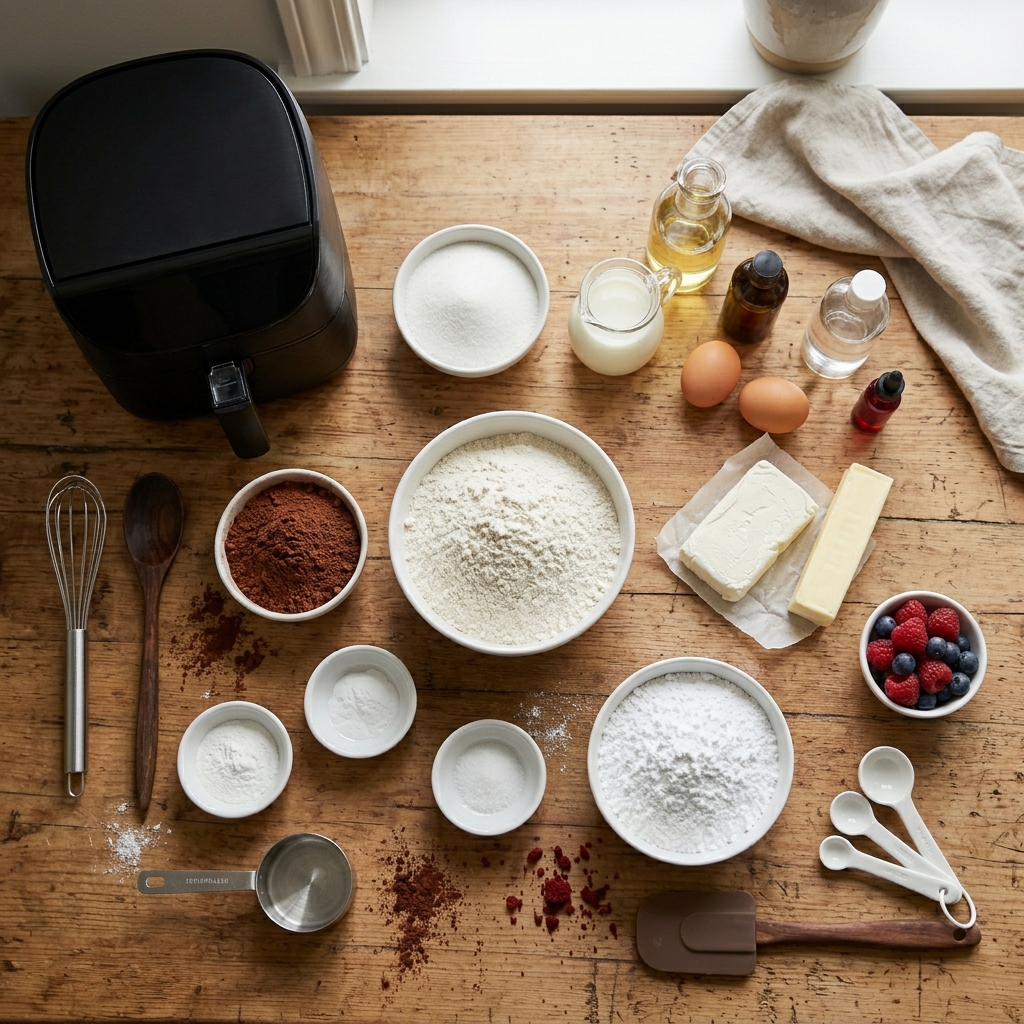
Before you begin, it’s helpful to gather and measure all your ingredients. Preparing everything ahead of time makes the baking process smoother and helps avoid mistakes.
For the Red Velvet Cake
- 1½ cups all-purpose flour
- 1 cup granulated sugar
- 1 tablespoon unsweetened cocoa powder
- 1 teaspoon baking powder
- ½ teaspoon baking soda
- ¼ teaspoon salt
- 2 large eggs, room temperature
- ½ cup buttermilk
- ½ cup vegetable oil
- 1 teaspoon pure vanilla extract
- 1 teaspoon white vinegar
- 1 tablespoon red food coloring
For the Cream Cheese Frosting
- 8 ounces cream cheese, softened
- ¼ cup unsalted butter, softened
- 2 cups powdered sugar
- 1 teaspoon vanilla extract
Optional Garnishes
- Red velvet cake crumbs
- White chocolate shavings
- Fresh strawberries
- Fresh raspberries
- A light dusting of powdered sugar
Understanding the Role of Each Ingredient
All-Purpose Flour
Flour forms the structure of the cake. Standard all-purpose flour works perfectly because it provides enough strength while still allowing for a tender crumb.
Cocoa Powder
Only a small amount of cocoa powder is needed. It adds depth without overpowering the signature red velvet flavor.
Buttermilk
Buttermilk contributes moisture and creates the cake’s soft texture. If you don’t have buttermilk available, you can make a quick substitute by mixing regular milk with a teaspoon of lemon juice or vinegar and letting it sit for five minutes.
Vegetable Oil
Oil keeps the cake moist for longer than butter alone. Even after a day or two, the cake remains soft and delicious.
Vinegar
Although it may seem unusual in a dessert, vinegar reacts with the baking soda, helping the cake rise beautifully while enhancing the traditional red velvet taste.
Cream Cheese
The frosting depends on full-fat cream cheese for its smooth consistency and balanced flavor. Low-fat versions can become too watery.
Step-by-Step Preparation Guide
Step 1: Prepare Your Air Fryer
Preheat your air fryer to 320°F (160°C) for about 3 to 5 minutes. Not every model requires preheating, but doing so helps ensure even baking.
Lightly grease a small round cake pan that fits comfortably inside your air fryer basket. Line the bottom with parchment paper for easier removal.
Step 2: Mix the Dry Ingredients
In a large mixing bowl, combine:
- All-purpose flour
- Sugar
- Cocoa powder
- Baking powder
- Baking soda
- Salt
Whisk everything together thoroughly to distribute the leavening agents evenly.
Step 3: Combine the Wet Ingredients
In a separate bowl, whisk together:
- Eggs
- Buttermilk
- Vegetable oil
- Vanilla extract
- White vinegar
- Red food coloring
Continue mixing until the color becomes smooth and evenly blended.
Step 4: Make the Batter
Gradually pour the wet mixture into the dry ingredients.
Using a spatula or whisk, gently combine the ingredients until no dry flour remains visible. Avoid overmixing, as excessive stirring can make the cake dense instead of soft and fluffy.
The finished batter should appear smooth, silky, and beautifully red.
Step 5: Fill the Cake Pan
Pour the batter into the prepared cake pan and gently tap it against the countertop two or three times. This removes large air bubbles and helps the cake bake evenly.
Leave a little room at the top of the pan, allowing the batter space to rise during baking.
Step 6: Bake in the Air Fryer
Carefully place the cake pan into the preheated air fryer basket.
Bake at 320°F (160°C) for approximately 22 to 28 minutes, depending on your air fryer model.
Avoid opening the basket too often during the first 18 minutes, as sudden temperature changes may affect the rise.
To check for doneness, insert a toothpick into the center of the cake. If it comes out clean or with only a few moist crumbs attached, the cake is ready.
Step 7: Cool Completely
Remove the cake pan carefully and place it on a wire rack.
Allow the cake to cool inside the pan for about 10 minutes before transferring it out to cool completely. Frosting a warm cake can cause the cream cheese frosting to melt.
Step 8: Prepare the Cream Cheese Frosting
While the cake cools, beat the softened cream cheese and butter together until smooth and creamy.
Gradually add the powdered sugar, mixing slowly at first to prevent a mess.
Finally, add the vanilla extract and continue beating until the frosting becomes light, fluffy, and spreadable.
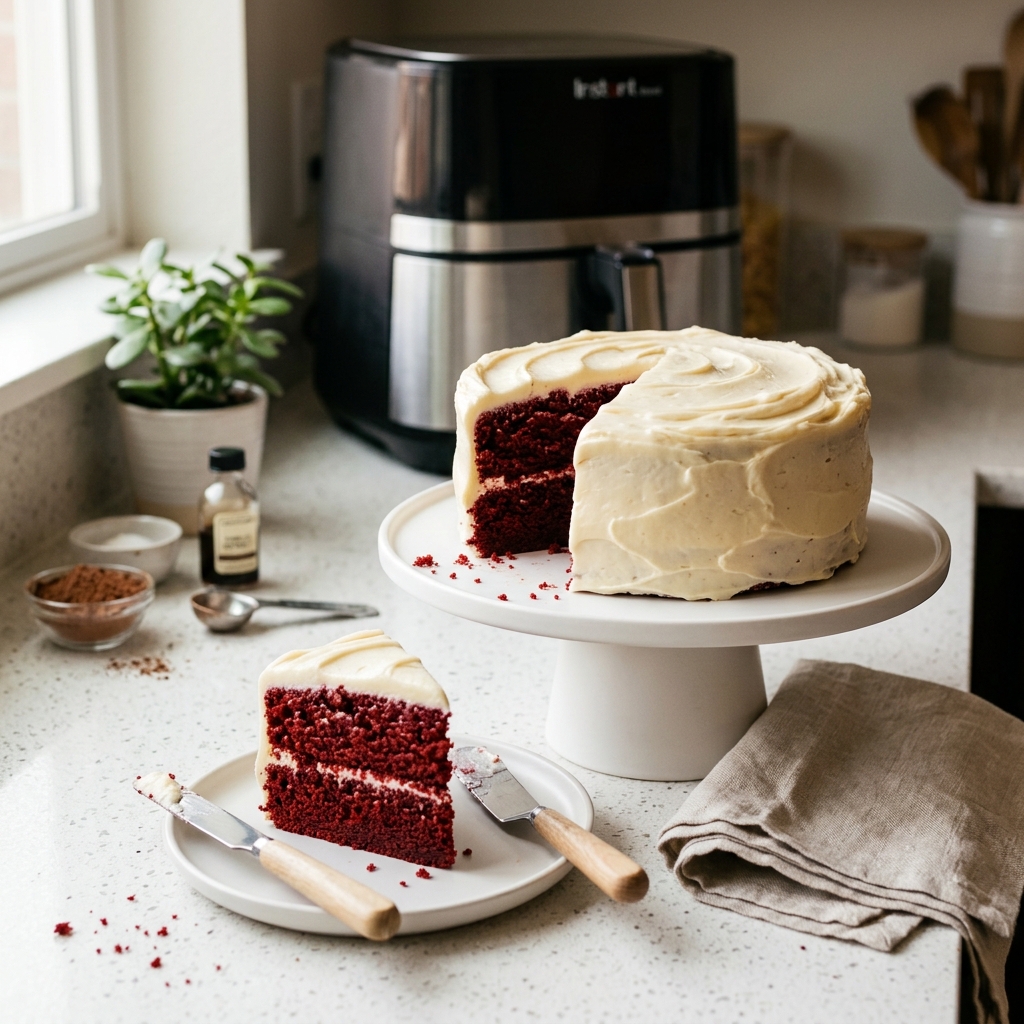
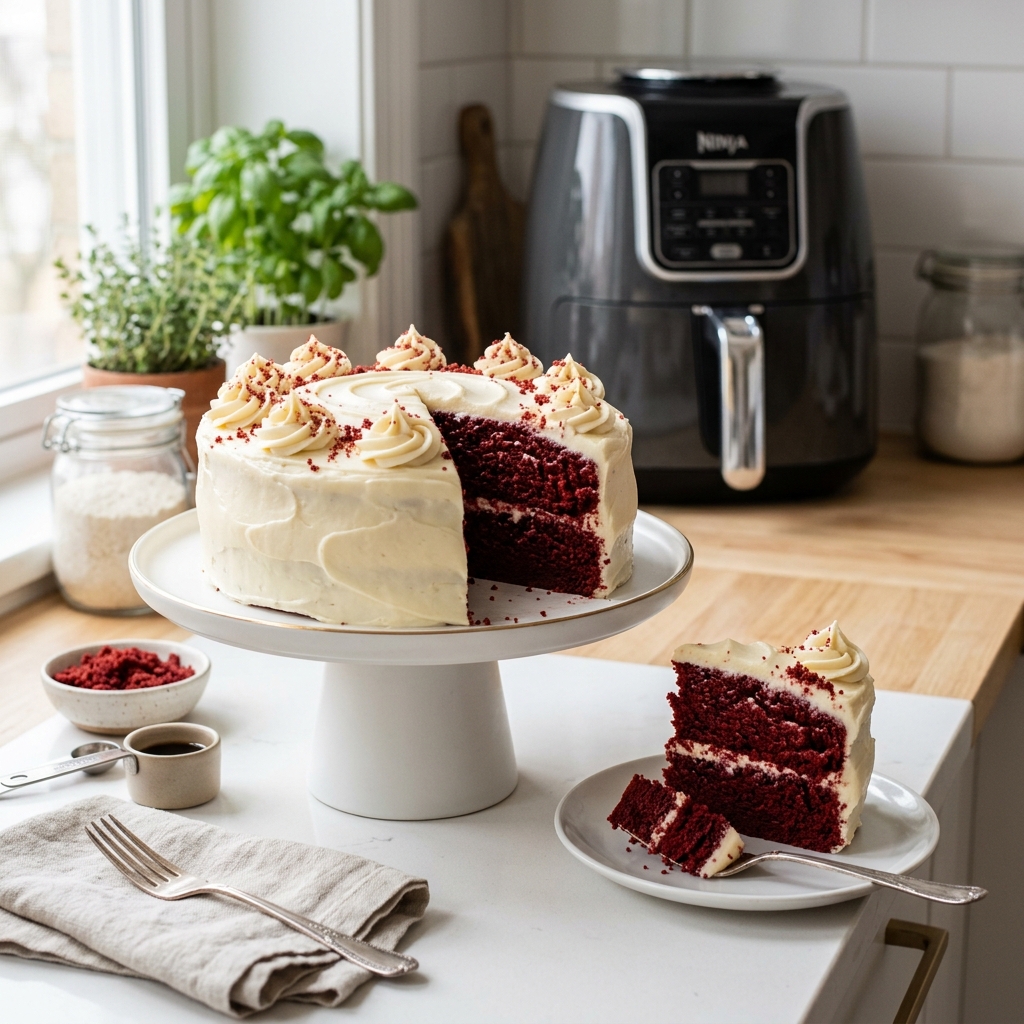
Step 9: Frost and Decorate
Spread a generous layer of cream cheese frosting over the cooled cake using an offset spatula or butter knife.
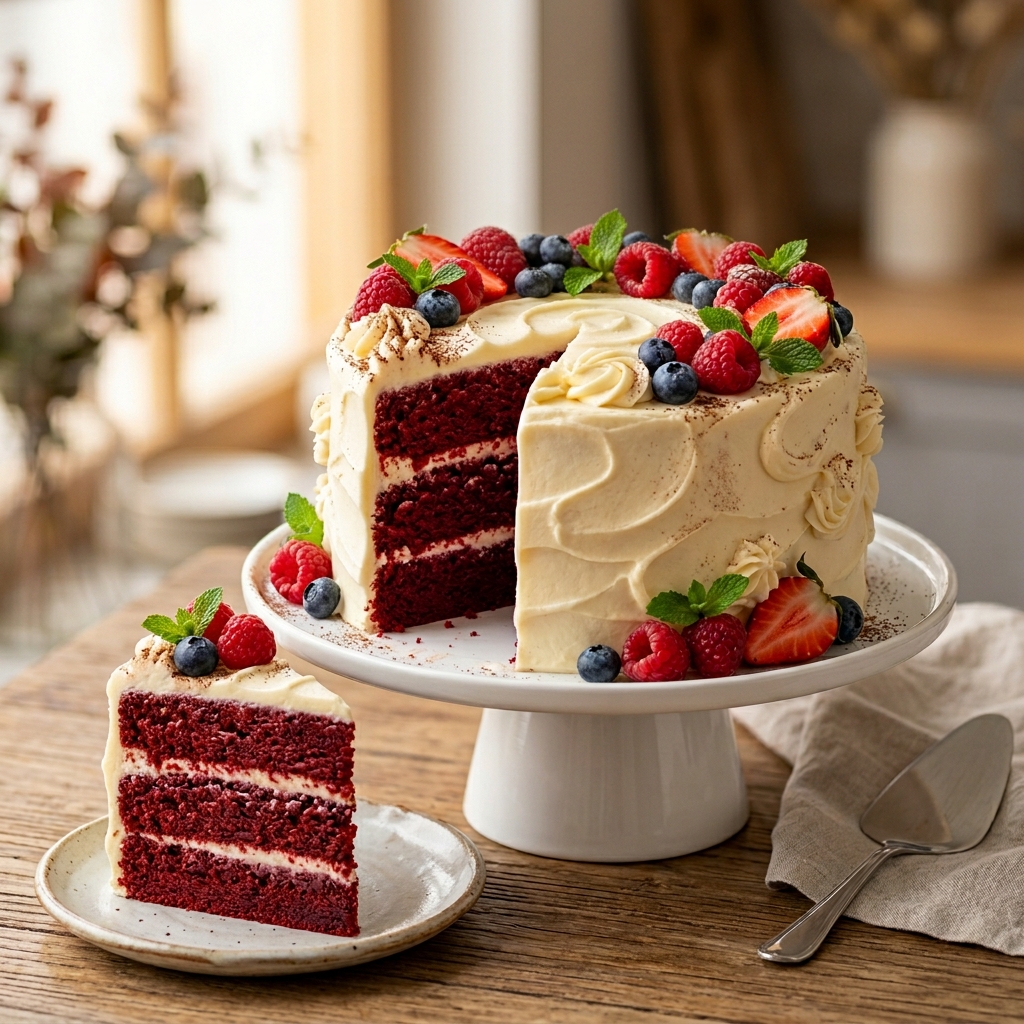
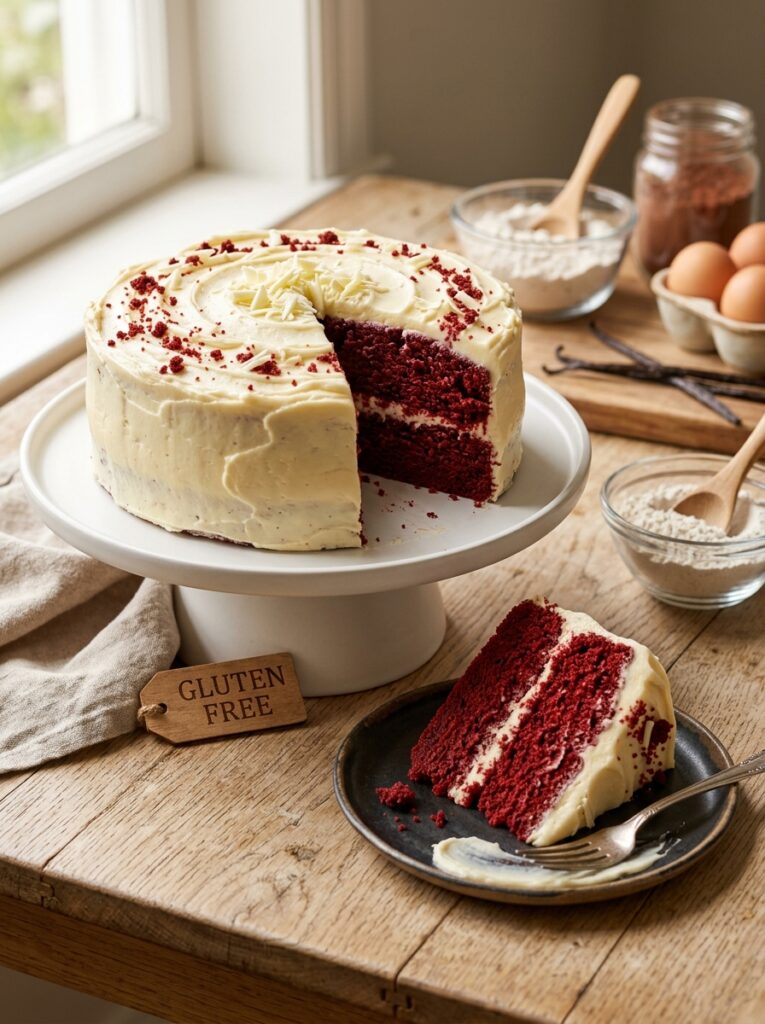
For a bakery-style finish, sprinkle red velvet crumbs over the top or decorate with white chocolate shavings and fresh berries.
At this point, your air fryer red velvet cake is ready to impress family, friends, or simply yourself. It delivers everything people love about traditional red velvet cake while proving that even the smallest apartment kitchen can produce spectacular homemade desserts.
Delicious Variations of This Recipe
One of the best things about this air fryer red velvet cake is how adaptable it can be. Once you’ve mastered the basic recipe, you can customize it to suit different tastes, occasions, and dietary preferences.
Mini Red Velvet Cupcakes
Instead of pouring the batter into a single cake pan, divide it among small silicone cupcake molds that fit inside your air fryer basket. Reduce the cooking time to around 10–14 minutes, checking with a toothpick for doneness.
These are perfect for birthday parties, office treats, or portion-controlled desserts.
Chocolate Chip Red Velvet Cake
Fold ½ cup of semi-sweet chocolate chips into the batter before baking. The melted pockets of chocolate add extra richness without overpowering the classic red velvet flavor.
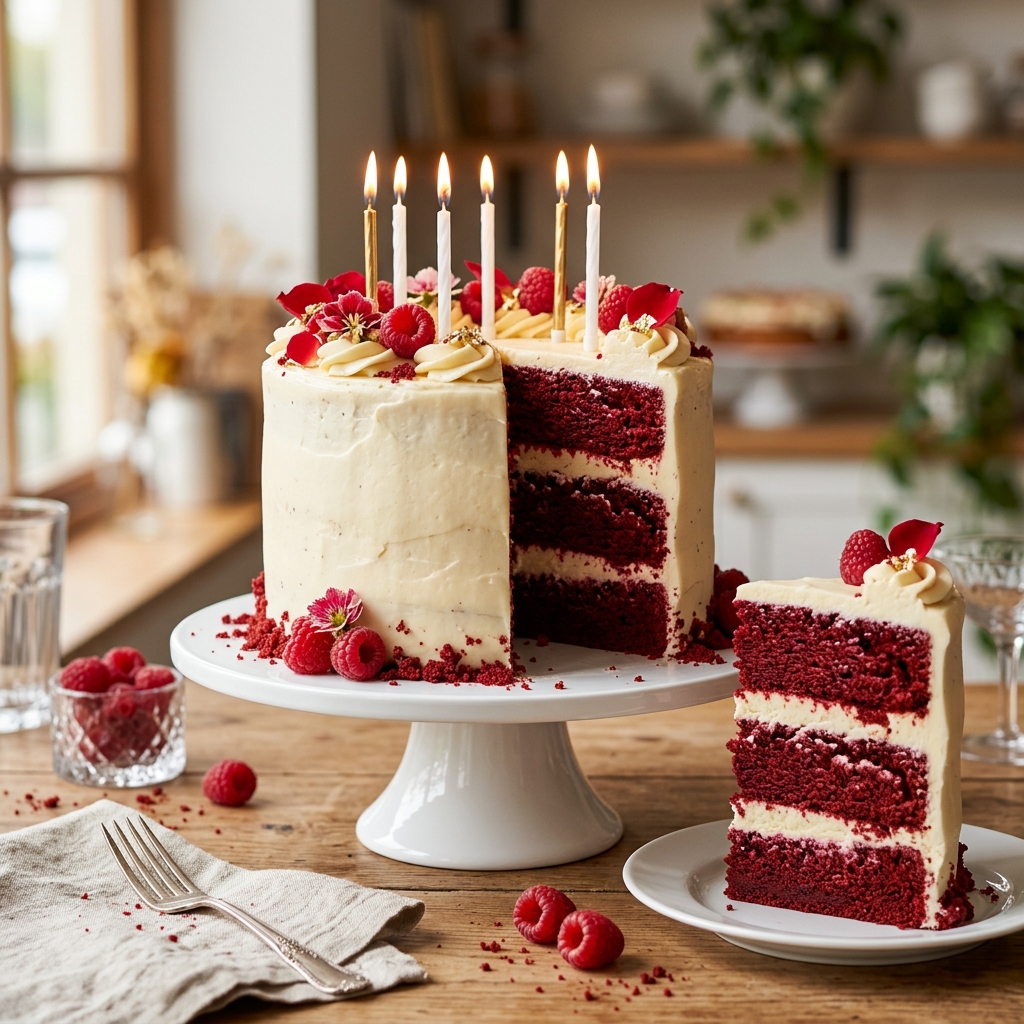
Layered Celebration Cake
If your air fryer basket is small, bake two thinner cakes separately and stack them with cream cheese frosting between the layers. This creates a stunning bakery-style dessert that looks much more elaborate than it actually is.
Berry Red Velvet Cake
Fresh raspberries or sliced strawberries pair beautifully with red velvet. Add a thin layer of berries between the cake and frosting for a fresh, slightly tart contrast.
Egg-Free Version
If you prefer an eggless cake, replace each egg with ¼ cup unsweetened applesauce or a commercial egg substitute. The texture will be slightly different but still wonderfully moist.
Less Sweet Frosting
Some people prefer a frosting that isn’t overly sugary. Simply reduce the powdered sugar by about ¼ to ½ cup and whip the mixture a little longer for a lighter finish.
Expert Tips for the Best Air Fryer Red Velvet Cake
Professional bakers often rely on small techniques that make a big difference. These simple tips will help ensure your cake turns out beautifully every time.
Use Room Temperature Ingredients
Cold eggs and cream cheese don’t blend as smoothly. Let refrigerated ingredients sit at room temperature for about 20 to 30 minutes before starting.
Measure Flour Correctly
Scooping flour directly with the measuring cup can pack it too tightly, leading to a dry cake. Instead, fluff the flour with a spoon, gently scoop it into the measuring cup, and level it off.
Don’t Overmix the Batter
Once the wet and dry ingredients come together, mix only until combined. Overmixing develops too much gluten, making the cake heavier.
Check Your Air Fryer Early
Every air fryer model cooks a little differently. Begin checking your cake a few minutes before the suggested baking time ends.
Cover the Top if Needed
If you notice the top browning too quickly while the center is still undercooked, loosely place a piece of aluminum foil over the pan for the remaining baking time.
Let the Cake Cool Completely
Patience is important. Cream cheese frosting spreads beautifully only on a fully cooled cake.
For an Extra Moist Cake
Wrap the cooled unfrosted cake tightly in plastic wrap and let it rest for a few hours before frosting. This allows the moisture to distribute evenly throughout the crumb.
Make Ahead Options
This recipe works wonderfully for advance preparation, making it ideal for parties and special occasions.
Bake the Cake Ahead of Time
You can bake the cake up to two days in advance. Once completely cooled, wrap it tightly in plastic wrap and keep it at room temperature.
Freeze for Later
The unfrosted cake freezes exceptionally well. Wrap it in two layers of plastic wrap followed by aluminum foil, then freeze for up to two months.
To serve, thaw overnight in the refrigerator and bring to room temperature before frosting.
Prepare the Frosting Early
Cream cheese frosting can be made up to three days ahead. Store it in an airtight container in the refrigerator, then allow it to soften slightly before spreading.
What to Serve With Air Fryer Red Velvet Cake
Although this cake is absolutely delicious on its own, pairing it with the right accompaniments can make dessert even more memorable.
Some excellent serving ideas include:
- Fresh strawberries
- Fresh raspberries
- Blueberries
- Vanilla ice cream
- Whipped cream
- Hot coffee
- Cappuccino
- Latte
- Black tea
- Hot chocolate
- Cold milk
- Strawberry sauce
- Chocolate drizzle
- White chocolate curls
For special occasions, serve each slice with a scoop of vanilla ice cream and a few fresh berries for a restaurant-quality presentation.
How to Store Air Fryer Red Velvet Cake
Proper storage helps preserve the cake’s soft texture and creamy frosting.
Room Temperature
If your kitchen is relatively cool, the unfrosted cake can be stored in an airtight container for up to two days.
Refrigerator
Once frosted, store the cake in the refrigerator because of the cream cheese frosting.
- Place it in an airtight cake container.
- Refrigerate for up to five days.
- Allow slices to sit at room temperature for about 20 minutes before serving for the best flavor and texture.
Freezer
Individual slices can also be frozen.
Wrap each slice tightly with plastic wrap and place them in a freezer-safe container. They will keep well for up to two months.
This is especially convenient when you want a homemade dessert without baking from scratch every time.
Frequently Asked Questions
1. Can I really bake a cake in an air fryer?
Absolutely. An air fryer functions much like a compact convection oven, circulating hot air evenly around the cake for excellent baking results.
2. What size cake pan should I use?
Choose a pan that fits comfortably inside your air fryer basket with a little space around the edges for air circulation. For most models, a 6-inch or 7-inch round pan works perfectly.
3. Can I make this recipe without buttermilk?
Yes. Mix ½ cup of milk with 1 teaspoon of lemon juice or white vinegar and let it stand for five minutes before using.
4. Why is my cake dry?
The most common causes are overbaking, measuring too much flour, or overmixing the batter.
5. Can I use natural food coloring?
Yes. Beet powder or natural red food coloring can be used, although the final color may be softer than traditional bright red velvet.
6. How do I know when the cake is done?
Insert a toothpick into the center. If it comes out clean or with only a few moist crumbs attached, the cake is ready.
7. Can I double the recipe?
Yes, but it’s usually better to bake two separate cakes rather than overcrowding one pan, especially in smaller air fryers.
8. Do I have to use cream cheese frosting?
Not at all. Buttercream frosting, whipped cream frosting, or even a simple powdered sugar glaze can work beautifully.
9. Is this recipe beginner-friendly?
Definitely. This recipe was designed specifically for home bakers, apartment renters, and anyone without access to a traditional oven.
10. Can I make this cake for birthdays and celebrations?
Absolutely. With its rich flavor, beautiful red color, and elegant cream cheese frosting, this air fryer red velvet cake is perfect for birthdays, anniversaries, holidays, Valentine’s Day, or any occasion that deserves a memorable homemade dessert.
Air Fryer Red Velvet Cake for Apartment Renters Without Ovens
Ingredients
Equipment
Method
- Preheat the air fryer to 320°F (160°C) for 3-5 minutes.
- Grease and line a 6-inch or 7-inch cake pan with parchment paper.
- In a large bowl, whisk together the flour, sugar, cocoa powder, baking powder, baking soda, and salt.
- In another bowl, combine the eggs, buttermilk, vegetable oil, vanilla extract, vinegar, and red food coloring.
- Gradually pour the wet ingredients into the dry ingredients and mix until just combined. Do not overmix.
- Transfer the batter into the prepared cake pan and smooth the top.
- Place the pan into the air fryer basket and bake for 22-28 minutes, or until a toothpick inserted into the center comes out clean.
- Remove the cake and allow it to cool in the pan for 10 minutes before transferring it to a cooling rack. Let it cool completely.
- To prepare the frosting, beat the softened cream cheese and butter until smooth. Gradually add the powdered sugar and vanilla extract, beating until light and fluffy.
- Spread the frosting evenly over the cooled cake.
- Garnish with cake crumbs, white chocolate shavings, or fresh berries if desired.
- Slice and serve.
Notes
Every air fryer cooks slightly differently, so begin checking for doneness around the 22-minute mark.
Use room temperature ingredients for the smoothest batter and frosting.
Do not frost the cake until it has completely cooled.
For a layered cake, bake two thinner cakes separately and stack them with frosting in between.
The unfrosted cake can be frozen for up to 2 months.
Store leftover frosted cake in an airtight container in the refrigerator for up to 5 days.