Finding a dessert that is beautiful, delicious, and safe for a wide variety of children can feel like an impossible challenge. School bake sales, classroom celebrations, and community events often require extra attention because many children live with food allergies that can turn an ordinary treat into a serious concern. That’s exactly why this nut-free red velvet cake deserves a special place in your recipe collection.
This cake combines the classic elegance of traditional red velvet with an allergy-conscious approach that makes it suitable for many school environments where nuts are strictly prohibited. Its soft, velvety crumb, subtle cocoa flavor, and creamy frosting create a bakery-quality dessert that looks just as incredible as it tastes. Whether you’re baking for a fundraiser, a birthday celebration, or simply because your family loves homemade desserts, this recipe offers peace of mind without sacrificing flavor.
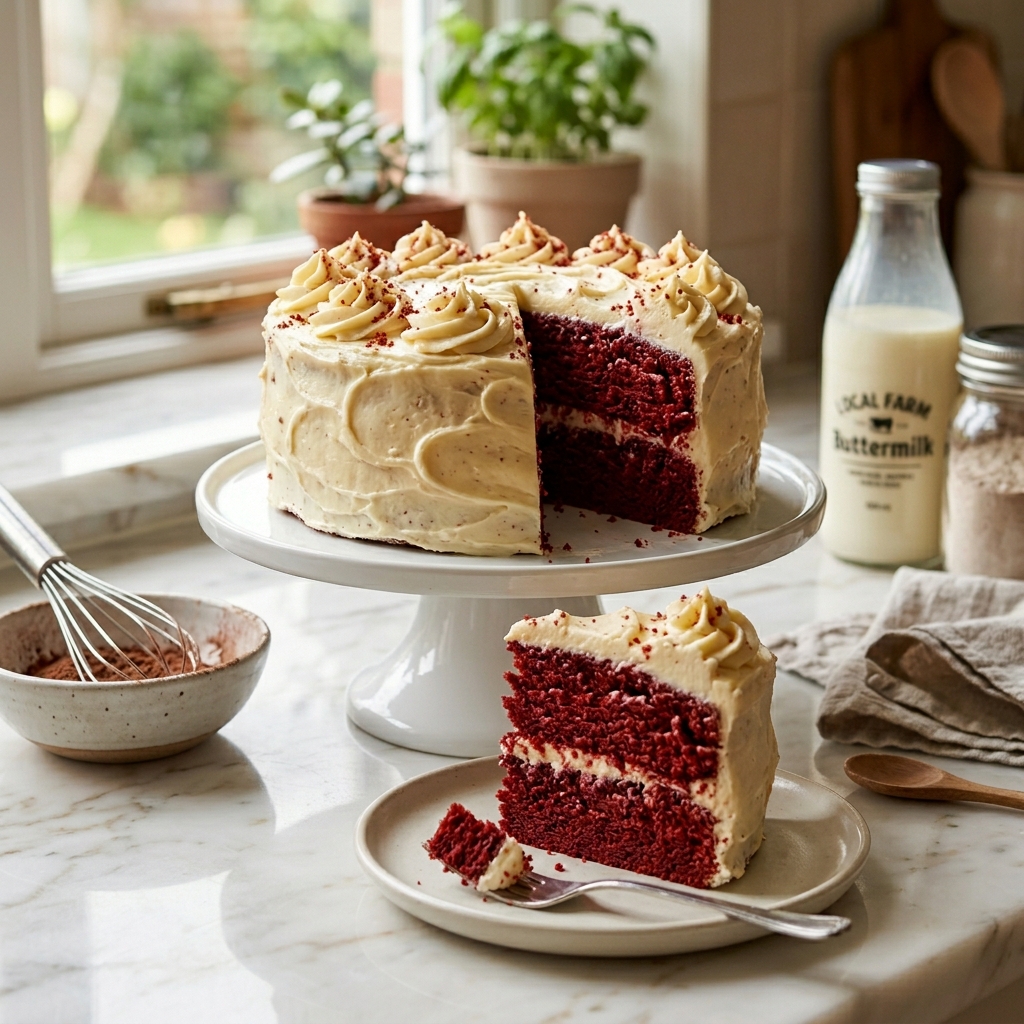
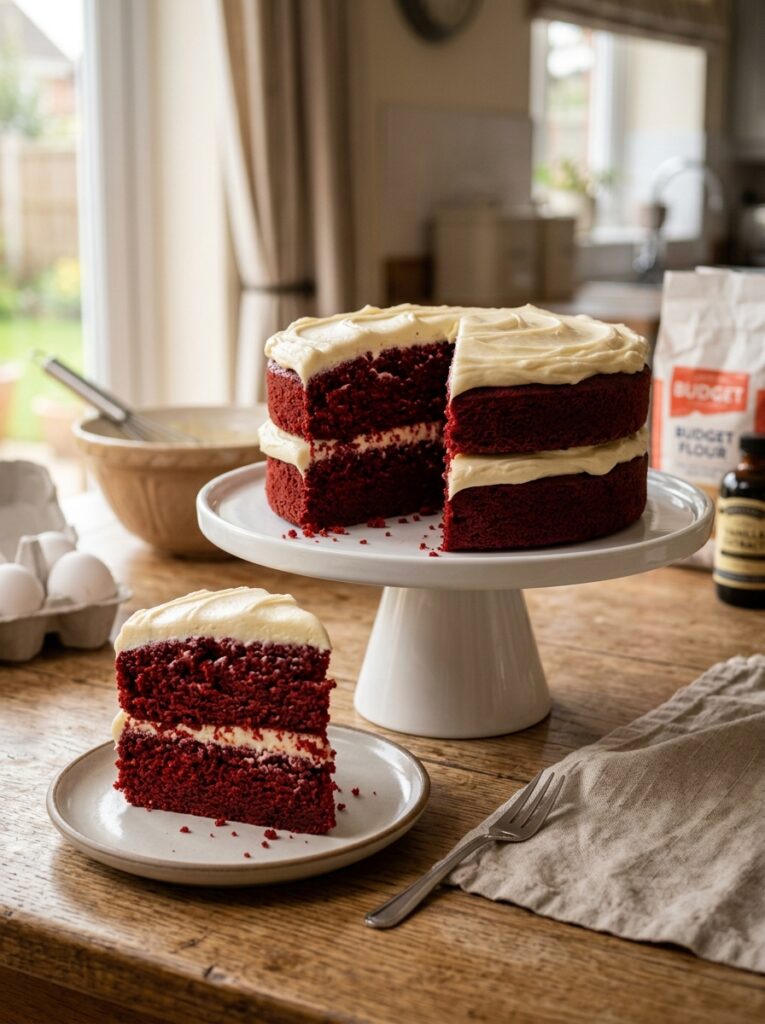
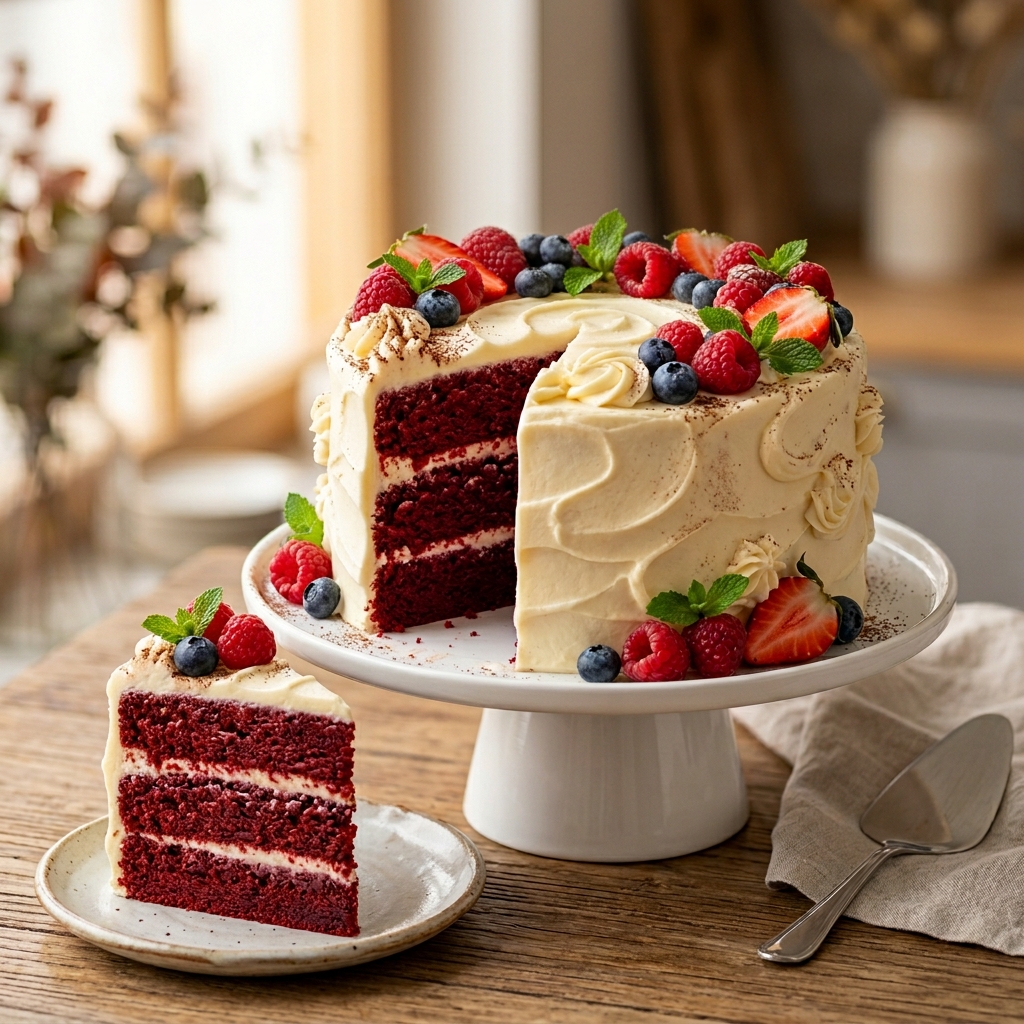
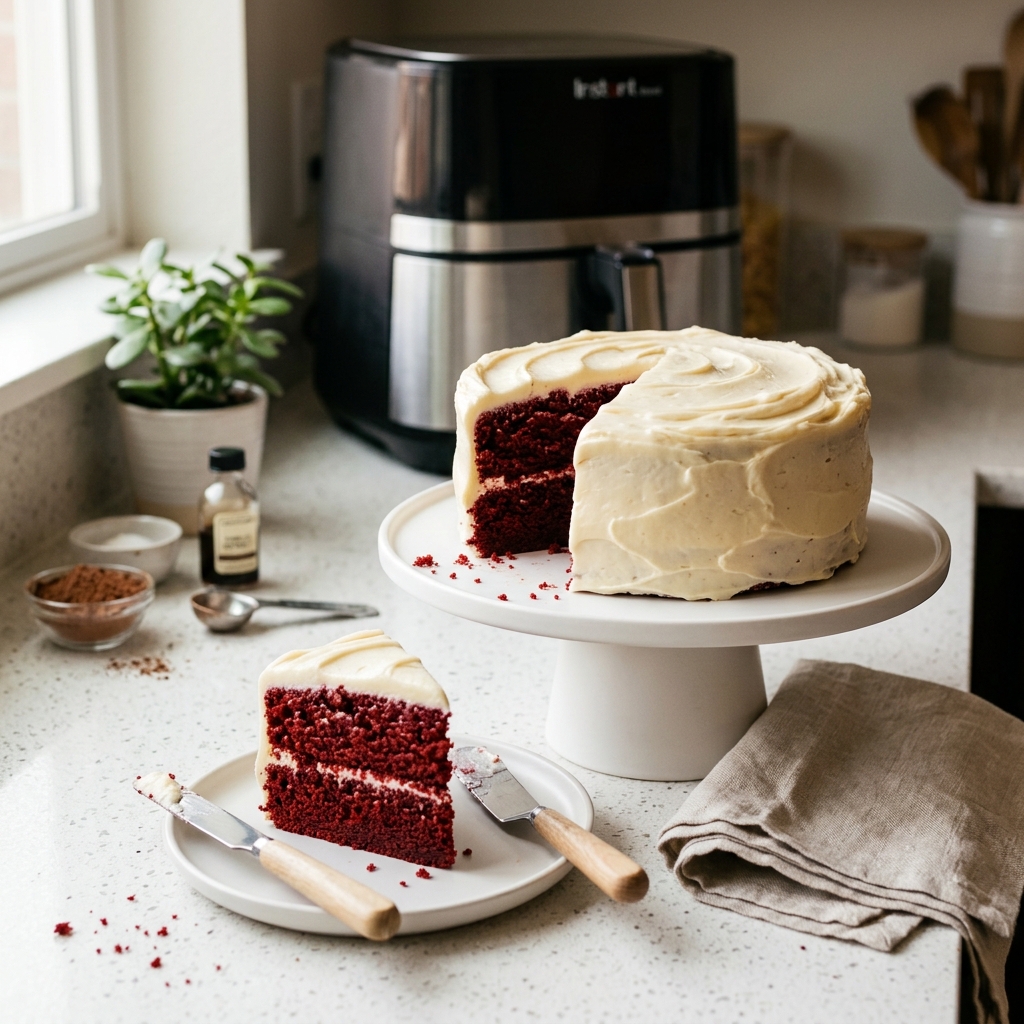
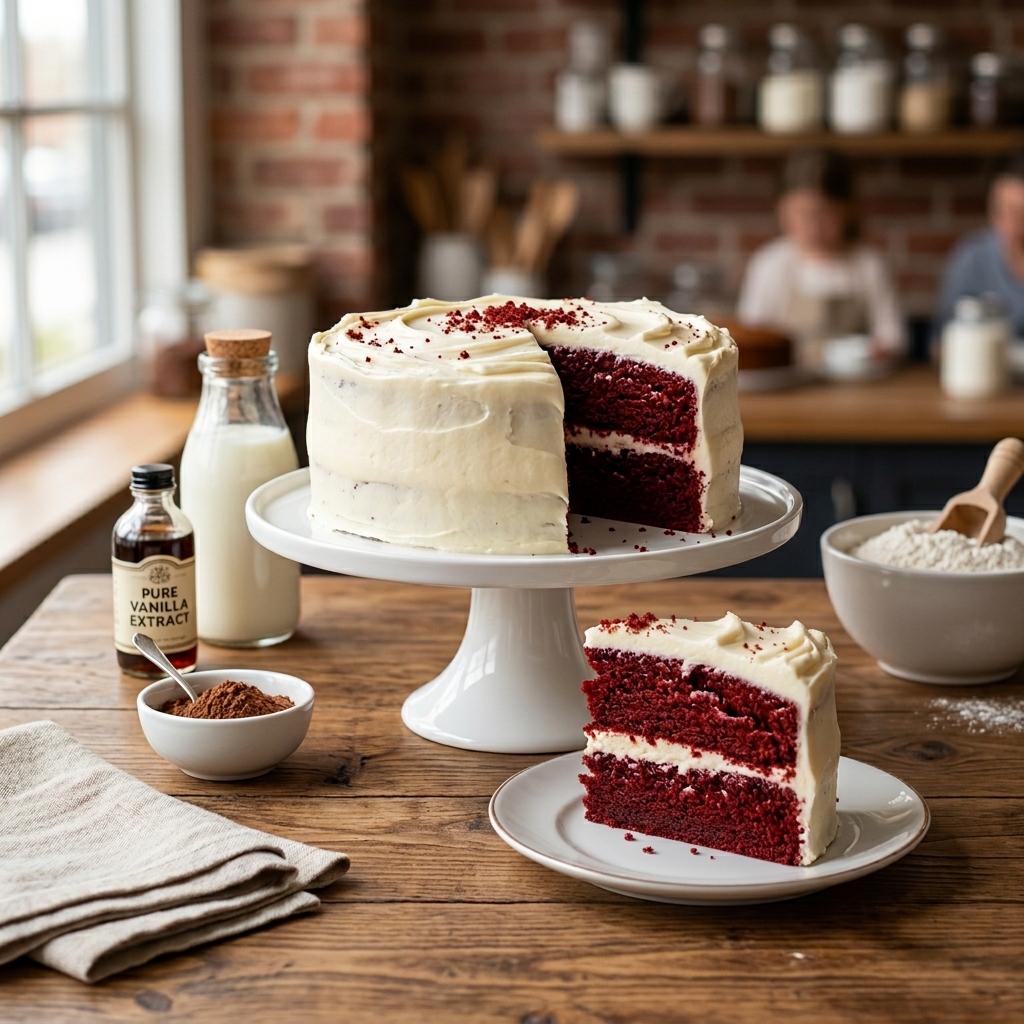
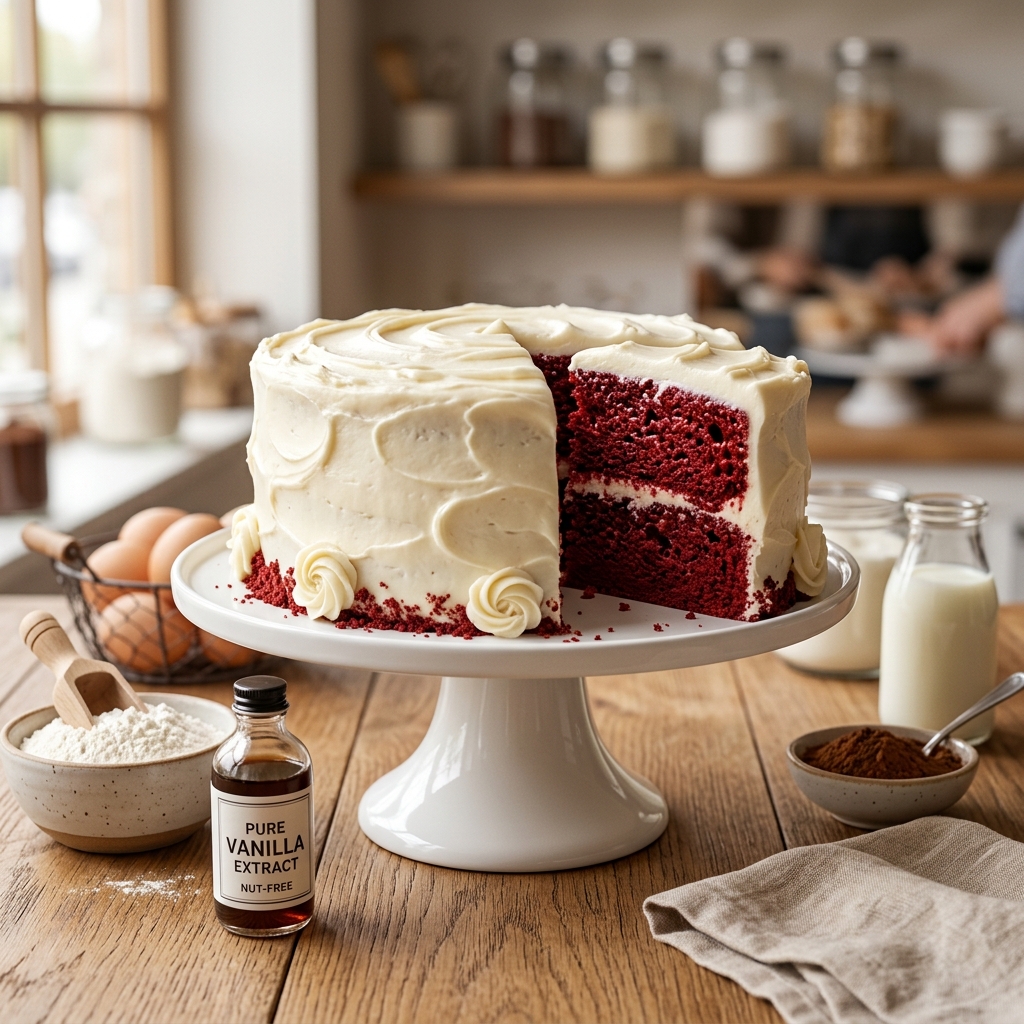
Red velvet cake has always been one of those desserts that captures attention instantly. The striking red layers contrasted against snowy white frosting create a visual masterpiece that stands out on any dessert table. When children and adults walk past a bake sale display, this is often the cake that makes them stop, smile, and ask for a slice.
But beyond its appearance lies something even more important: inclusivity. Food should bring people together, not leave anyone feeling left out. By creating a nut-free version designed with allergy awareness in mind, you’re making it possible for more families to enjoy a homemade treat with confidence.
Why This Recipe Is Perfect for School Bake Sales
Anyone who has volunteered at a school event knows that allergy-friendly recipes are becoming more valuable every year. Many schools now have strict policies regarding peanuts and tree nuts, and some even prohibit homemade items that contain them. A nut-free red velvet cake fits naturally into these guidelines while still offering something special.
Unlike many elaborate desserts that require unusual ingredients or advanced decorating skills, this cake relies on simple pantry staples. Most home bakers already have flour, sugar, cocoa powder, eggs, and vanilla extract on hand. The result is a recipe that feels both accessible and impressive.
Another reason this cake works so well for bake sales is its excellent presentation. It slices neatly, travels well, and holds its shape at room temperature for several hours. Individual slices can be wrapped for easy selling, or the cake can be displayed whole as a centerpiece before serving.
The balanced flavor profile also appeals to a wide audience. The cocoa is subtle rather than overpowering, allowing the creamy frosting and soft cake texture to shine. Children enjoy its sweetness, while adults appreciate its classic homemade taste.
Perhaps the greatest advantage is that this recipe demonstrates care and thoughtfulness. Parents of children with allergies often have limited dessert options at public events. Seeing a clearly labeled nut-free cake can make them feel included and welcomed, which is one of the best compliments a baker can receive.
The Secret Behind a Great Red Velvet Cake
Many people assume that red velvet cake is simply chocolate cake colored red, but experienced bakers know there’s much more to it than that.
Traditional red velvet cake has a delicate cocoa flavor rather than an intense chocolate taste. It also features a unique tanginess that comes from the combination of buttermilk and a small amount of vinegar. These ingredients react with the baking soda, creating an incredibly soft and tender crumb.
The vibrant color is another hallmark of the recipe. Modern food coloring helps achieve the classic deep red appearance that makes the cake instantly recognizable. High-quality gel food coloring often produces richer results while requiring less product.
Moisture is equally important. Vegetable oil helps keep the cake soft even after a day or two, making it an ideal make-ahead dessert for busy parents preparing for school events. Unlike butter-based cakes that can dry out more quickly, this recipe remains tender and delicious.
Finally, the frosting plays a crucial role. A smooth cream cheese frosting adds a slight tang that perfectly balances the sweetness of the cake. The contrast between the fluffy white frosting and the red cake layers creates the iconic appearance that has made red velvet one of the world’s favorite celebration cakes.
Ingredients
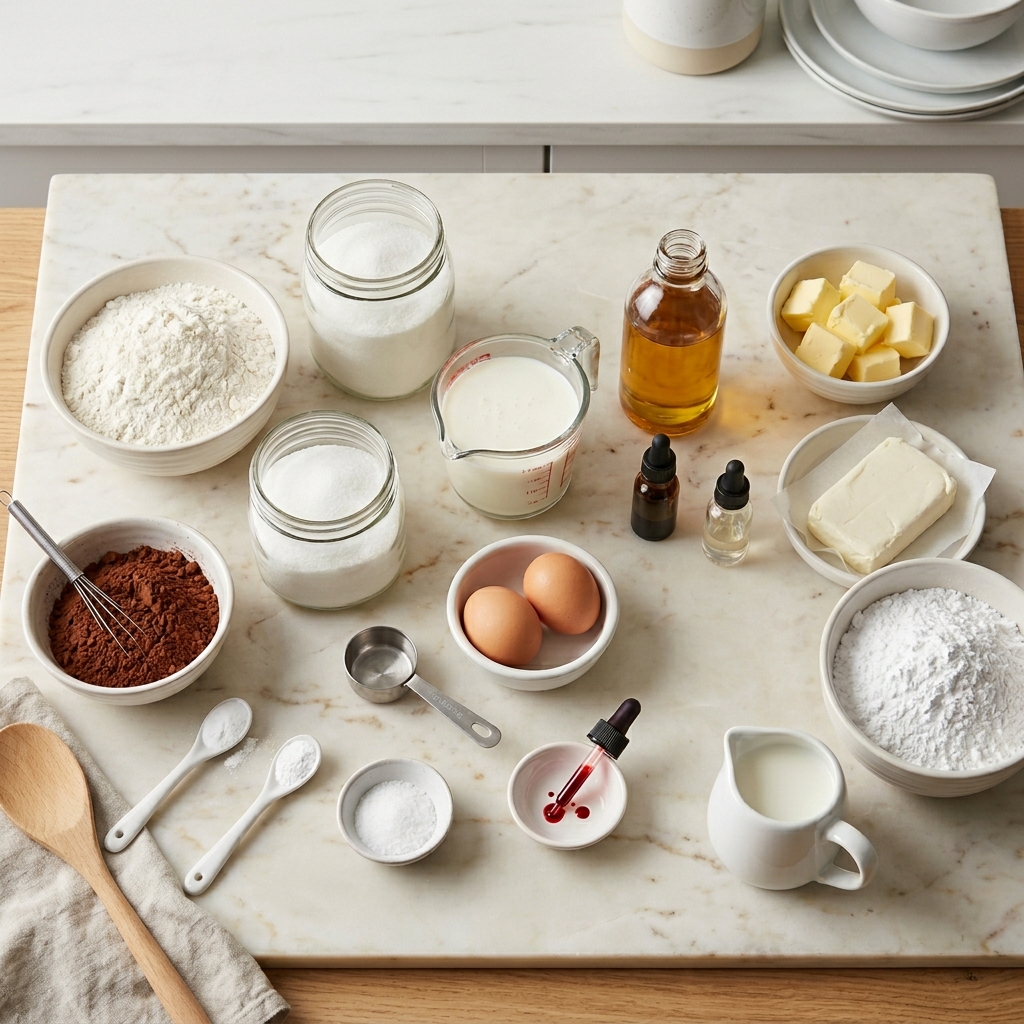
The beauty of this recipe lies in its simple, easy-to-find ingredients. Always double-check product labels to ensure they are produced in nut-free facilities if you are baking for someone with severe allergies.
For the Cake
- 2½ cups all-purpose flour
- 1½ cups granulated sugar
- 1 tablespoon unsweetened cocoa powder
- 1 teaspoon baking soda
- ½ teaspoon baking powder
- ½ teaspoon salt
- 2 large eggs, room temperature
- 1 cup buttermilk, room temperature
- 1 cup vegetable oil
- 2 teaspoons pure vanilla extract
- 1 teaspoon white vinegar
- 1 tablespoon red food coloring (or equivalent gel coloring)
For the Cream Cheese Frosting
- 8 ounces cream cheese, softened
- ½ cup unsalted butter, softened
- 4 cups powdered sugar
- 2 teaspoons vanilla extract
- 2 to 3 tablespoons milk, if needed for consistency
Optional Decorations
- Red velvet cake crumbs
- White chocolate curls (verify nut-free production)
- Fresh strawberries
- A light dusting of powdered sugar
Ingredient Tips
Choosing the Flour
Standard all-purpose flour provides the ideal balance between structure and softness. Measure it correctly by spooning it into the measuring cup and leveling it off instead of scooping directly from the bag.
Why Buttermilk Matters
Buttermilk gives red velvet cake its signature tenderness and mild tang. If you don’t have buttermilk available, you can make a quick substitute by adding one tablespoon of lemon juice or white vinegar to one cup of milk and letting it sit for five minutes.
Selecting Safe Ingredients
When baking for allergy-sensitive environments, always inspect packaging for advisory statements regarding peanuts or tree nuts. Cross-contamination can occur during manufacturing, so reading labels carefully is an important step.
The Role of Vinegar
Some people worry that vinegar will affect the taste, but it actually disappears during baking while helping activate the baking soda for a lighter texture.
Step-by-Step Preparation Guide
Step 1: Prepare Your Baking Equipment
Preheat your oven to 350°F (175°C). Grease two 9-inch round cake pans and line the bottoms with parchment paper circles. This extra step ensures the cakes release perfectly after baking.
Gather and measure all your ingredients before you begin. Professional bakers call this “mise en place,” and it helps prevent mistakes while making the process smoother.
Step 2: Combine the Dry Ingredients
In a large mixing bowl, whisk together:
- All-purpose flour
- Sugar
- Cocoa powder
- Baking soda
- Baking powder
- Salt
Whisking helps distribute the leavening agents evenly and removes any lumps from the cocoa powder.
Step 3: Mix the Wet Ingredients
In a separate bowl, combine:
- Eggs
- Buttermilk
- Vegetable oil
- Vanilla extract
- White vinegar
- Red food coloring
Whisk until the mixture becomes smooth and the color is evenly blended.
Step 4: Create the Batter
Gradually pour the wet ingredients into the dry ingredients while mixing on low speed. Stir only until everything is combined.
Avoid overmixing. Too much mixing develops excess gluten, which can make the cake dense instead of soft and tender.
The finished batter should be smooth, slightly thick, and beautifully red.
Step 5: Fill the Cake Pans
Divide the batter evenly between the prepared pans. Gently tap each pan on the counter a few times to release any trapped air bubbles.
Use a spatula to smooth the tops for even baking.
Step 6: Bake the Cake
Place the pans in the center of the preheated oven.
Bake for approximately 28 to 32 minutes, or until a toothpick inserted into the center comes out with only a few moist crumbs attached.
Avoid opening the oven door during the first twenty minutes, as sudden temperature changes can cause the cakes to sink.
Step 7: Cool Completely
Allow the cakes to cool in their pans for about 10 to 15 minutes.
Carefully turn them out onto wire racks and let them cool completely before frosting. Attempting to frost warm cake layers will cause the frosting to melt and slide.
Step 8: Prepare the Cream Cheese Frosting
Beat the softened cream cheese and butter together until smooth and fluffy.
Gradually add the powdered sugar, one cup at a time, mixing well after each addition.
Add the vanilla extract and continue beating until creamy. If the frosting seems too thick, add milk one tablespoon at a time until you reach a spreadable consistency.
Step 9: Assemble the Cake
Place one cake layer on your serving plate or cake stand.
Spread a generous layer of frosting evenly across the top.
Position the second cake layer carefully and frost the top and sides of the cake. Use an offset spatula for the smoothest finish.
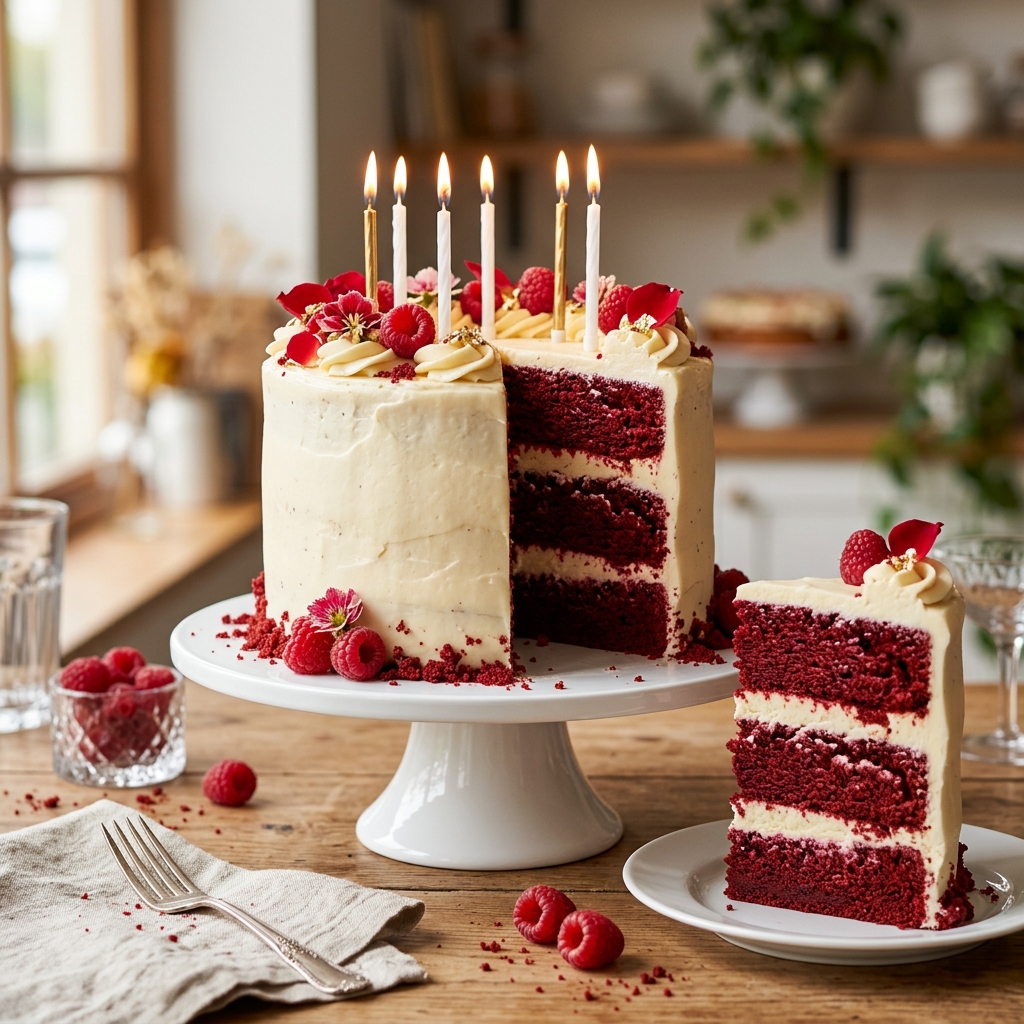
If desired, decorate with reserved cake crumbs or fresh strawberries for an elegant presentation that is perfect for school bake sales and family celebrations alike.
Variations of This Recipe
One of the best things about this nut-free red velvet cake is how versatile it can be. Once you master the basic recipe, you can easily adapt it for different occasions while still keeping it safe for school environments and allergy-conscious gatherings.
Nut-Free Red Velvet Cupcakes
Instead of baking two round cakes, divide the batter among lined cupcake tins. Fill each liner about two-thirds full and bake for 18 to 22 minutes.
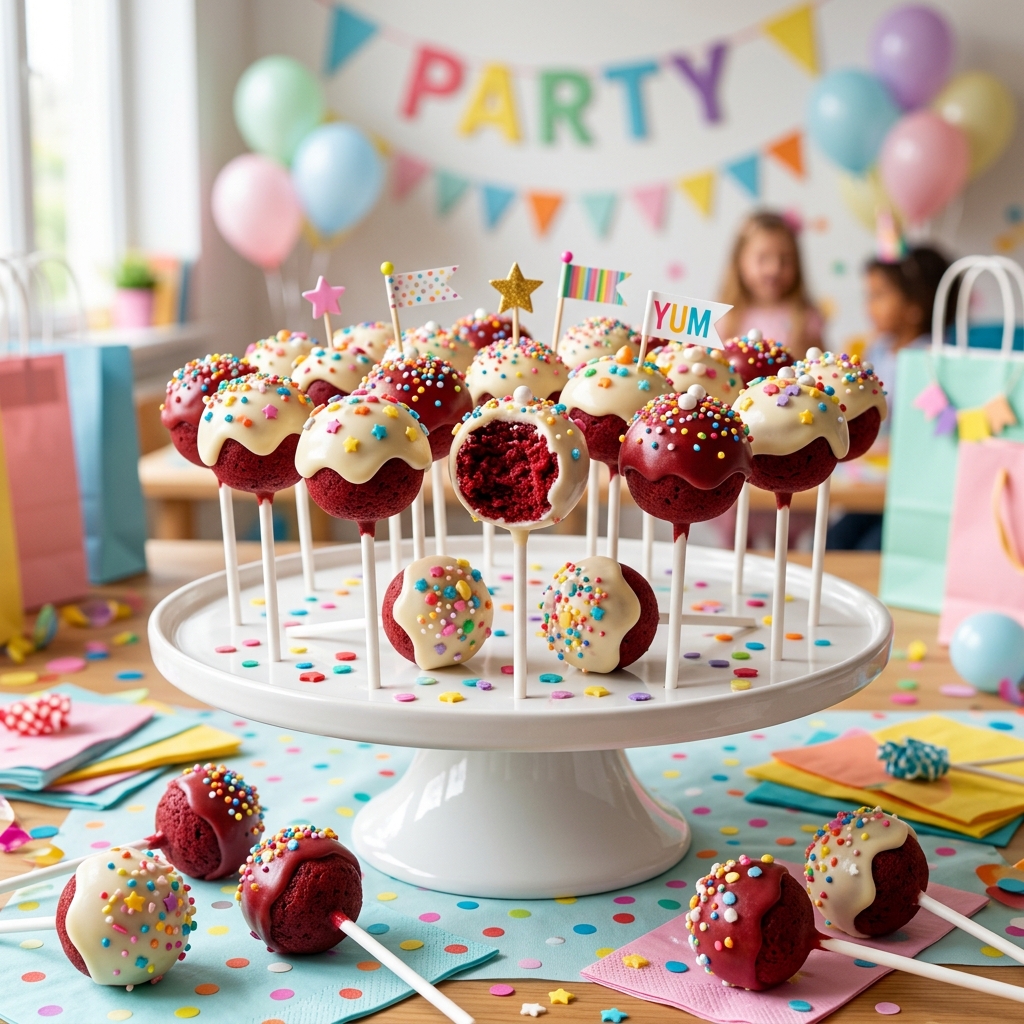
Cupcakes are often an even better choice for bake sales because they are easy to package individually, simple to transport, and require no slicing.
Mini Layer Cakes
Use smaller cake pans or biscuit cutters to create individual mini cakes. Layer them with cream cheese frosting for an elegant dessert that looks like it came from a professional bakery.
Sheet Cake Version
For larger school events, bake the batter in a 9×13-inch pan. This version is easier to cut into uniform squares and serves a larger crowd without requiring complicated assembly.
Naturally Colored Red Velvet Cake
If you prefer to avoid artificial food coloring, beet powder or concentrated beet juice can provide a beautiful natural red hue. The color may be softer than traditional red velvet, but the flavor remains wonderful.
Dairy-Free Adaptation
If additional dietary restrictions need to be considered, substitute the buttermilk with a dairy-free milk mixed with vinegar and replace the cream cheese frosting with a dairy-free alternative. Always verify that substitute products are also nut-free.
Expert Tips for the Perfect Nut-Free Red Velvet Cake
Professional bakers know that small details often make the difference between a good cake and an unforgettable one.
Use Room Temperature Ingredients
Cold eggs and buttermilk do not blend as smoothly into the batter. Let refrigerated ingredients sit out for about 30 minutes before baking for the best texture.
Measure Flour Carefully
Too much flour is one of the most common causes of dry cakes. Spoon the flour into the measuring cup and level it with a knife rather than scooping directly from the bag.
Do Not Overmix
Once the wet and dry ingredients are combined, mix only until you no longer see streaks of flour. Overmixing develops gluten, resulting in a tougher cake.
Bake on the Center Rack
Positioning the cake in the middle of the oven allows heat to circulate evenly, helping both layers bake consistently.
Chill Before Decorating
If you want exceptionally clean frosting lines, refrigerate the cake layers for 20 to 30 minutes before assembling. Slightly chilled cakes are easier to frost and produce fewer crumbs.
Create a Crumb Coat
Apply a thin layer of frosting over the entire cake and refrigerate it for 15 minutes. Then add the final layer of frosting. This simple bakery trick creates a smooth, polished finish.
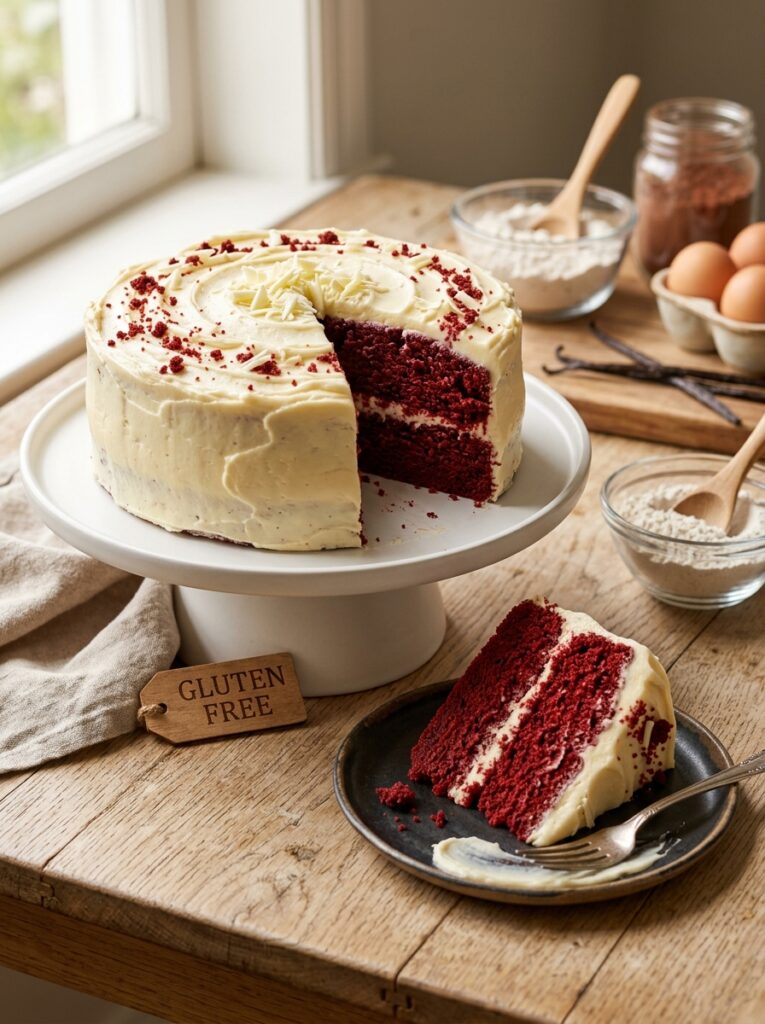
Always Label Allergy-Friendly Desserts
If serving this cake at a bake sale or school function, clearly label it as “Nut-Free.” This helps parents and teachers quickly identify safer options for children with allergies.
Make Ahead Options
This cake is an excellent make-ahead dessert, making it perfect for busy families and school event volunteers.
Prepare the Cake Layers in Advance
The cake layers can be baked up to two days before serving. Once completely cool, wrap each layer tightly in plastic wrap and store them at room temperature.
Freeze for Longer Storage
The unfrosted cake layers freeze beautifully for up to three months. Wrap them in plastic wrap followed by aluminum foil, then place them in a freezer-safe bag.
When ready to use, thaw overnight in the refrigerator before frosting.
Make the Frosting Ahead
Cream cheese frosting can be prepared up to three days in advance. Store it in an airtight container in the refrigerator, then allow it to soften slightly before spreading.
Assemble the Day Before
The fully assembled cake can be frosted and refrigerated one day ahead of your event. In fact, many bakers believe the flavor improves after the layers have had time to settle.
What to Serve With It
Although this cake shines on its own, pairing it with the right accompaniments can make the experience even more memorable.
Some excellent serving ideas include:
- Fresh strawberries
- Raspberries or blueberries
- A glass of cold milk
- Hot chocolate
- Freshly brewed coffee
- Black tea or vanilla tea
- Homemade whipped cream
- Vanilla frozen yogurt
- Fresh fruit salad
- A scoop of vanilla ice cream
For school bake sales, individual slices wrapped with a few fresh berries make an attractive presentation that customers often find irresistible.
How to Store Nut-Free Red Velvet Cake
Proper storage helps maintain the cake’s moisture and freshness.
At Room Temperature
If your kitchen is cool, the frosted cake can remain covered at room temperature for up to one day.
In the Refrigerator
Because the frosting contains cream cheese, longer storage should be in the refrigerator. Place the cake in an airtight cake container or cover it loosely with plastic wrap.
It will stay fresh for up to five days.
Before serving, allow the cake to sit at room temperature for about 20 to 30 minutes. This softens the frosting and improves the overall texture.
Freezing Leftovers
Individual slices freeze exceptionally well. Wrap each slice tightly in plastic wrap, then place them in a freezer-safe container.
Frozen slices can be stored for up to three months.
Simply thaw overnight in the refrigerator or let them sit at room temperature for about an hour before enjoying.
Frequently Asked Questions
1. Is this cake completely allergy-safe?
This recipe contains no peanuts or tree nuts, but ingredient labels should always be checked for manufacturing cross-contact warnings if baking for someone with severe allergies.
2. Why is vinegar added to red velvet cake?
Vinegar reacts with the baking soda and buttermilk to create a lighter, softer crumb. It does not leave a vinegar taste after baking.
3. Can I make this recipe into cupcakes?
Absolutely. This batter works wonderfully for cupcakes and usually yields about 24 standard-sized cupcakes.
4. Can I use liquid food coloring instead of gel?
Yes. Liquid food coloring works well, although you may need a larger amount to achieve the classic vibrant red color.
5. Can I bake this cake the night before a school event?
Yes. In fact, making it a day ahead often improves the flavor and allows the frosting to set beautifully.
6. How do I prevent the cake from becoming dry?
Measure the flour accurately, avoid overbaking, and do not overmix the batter. These three simple steps help ensure a moist and tender cake.
7. Can this recipe be doubled?
Yes. The recipe doubles easily if you need to prepare multiple cakes for larger bake sales or fundraising events.
8. What makes red velvet different from chocolate cake?
Red velvet contains only a small amount of cocoa powder and has a distinctive tang from buttermilk and vinegar, giving it a unique flavor profile that differs from traditional chocolate cake.
9. How should I package slices for a bake sale?
Individual slices can be wrapped in clear food-safe bags or small dessert boxes. Adding a simple label that reads “Nut-Free Red Velvet Cake” helps customers identify the dessert quickly.
10. Can children help make this recipe?
Yes. Many of the steps, such as measuring ingredients, mixing the batter, and decorating the finished cake, are simple enough for children to assist with under adult supervision.
Final Thoughts
A truly great bake sale recipe does more than taste good—it brings people together. This nut-free red velvet cake combines classic homemade flavor with thoughtful ingredient choices, making it a dessert that many families can enjoy with confidence.
Its vibrant appearance catches attention, its soft texture keeps people coming back for another bite, and its allergy-conscious design helps create a more inclusive table where no child has to feel left out. Whether you’re baking for a classroom fundraiser, a neighborhood gathering, or a family celebration, this recipe proves that safe desserts can also be absolutely unforgettable.
Once you’ve made it, don’t be surprised if it becomes the most requested cake in your recipe collection.
Nut-Free Red Velvet Cake for School Bake Sales with Allergy Restrictions
Ingredients
Equipment
Method
- Preheat the oven to 350°F (175°C). Grease and line two 9-inch cake pans with parchment paper.
- In a large bowl, whisk together the flour, sugar, cocoa powder, baking soda, baking powder, and salt.
- In another bowl, whisk together the eggs, buttermilk, vegetable oil, vanilla extract, vinegar, and red food coloring until fully combined.
- Gradually add the wet ingredients to the dry ingredients and mix until just combined. Do not overmix.
- Divide the batter evenly between the prepared cake pans and smooth the tops.
- Bake for 28 to 32 minutes, or until a toothpick inserted into the center comes out with a few moist crumbs.
- Allow the cakes to cool in the pans for 10 to 15 minutes before transferring them to a cooling rack. Let them cool completely.
- For the frosting, beat the cream cheese and butter until smooth. Gradually mix in the powdered sugar, then add the vanilla extract. Add milk if needed to achieve a smooth, spreadable consistency.
- Place one cake layer on a serving plate and spread a generous layer of frosting over the top. Add the second layer and frost the top and sides evenly.
- Decorate with cake crumbs, fresh strawberries, or white chocolate curls if desired. Chill briefly before slicing and serving.
Notes
Room temperature ingredients help create a smoother batter and a softer cake texture.
Avoid overmixing to keep the cake light and tender.
The cake layers can be baked one day ahead and frosted before serving.
This recipe can easily be turned into approximately 24 cupcakes by reducing the baking time to 18–22 minutes.
Store leftovers covered in the refrigerator for up to 5 days or freeze individual slices for up to 3 months.