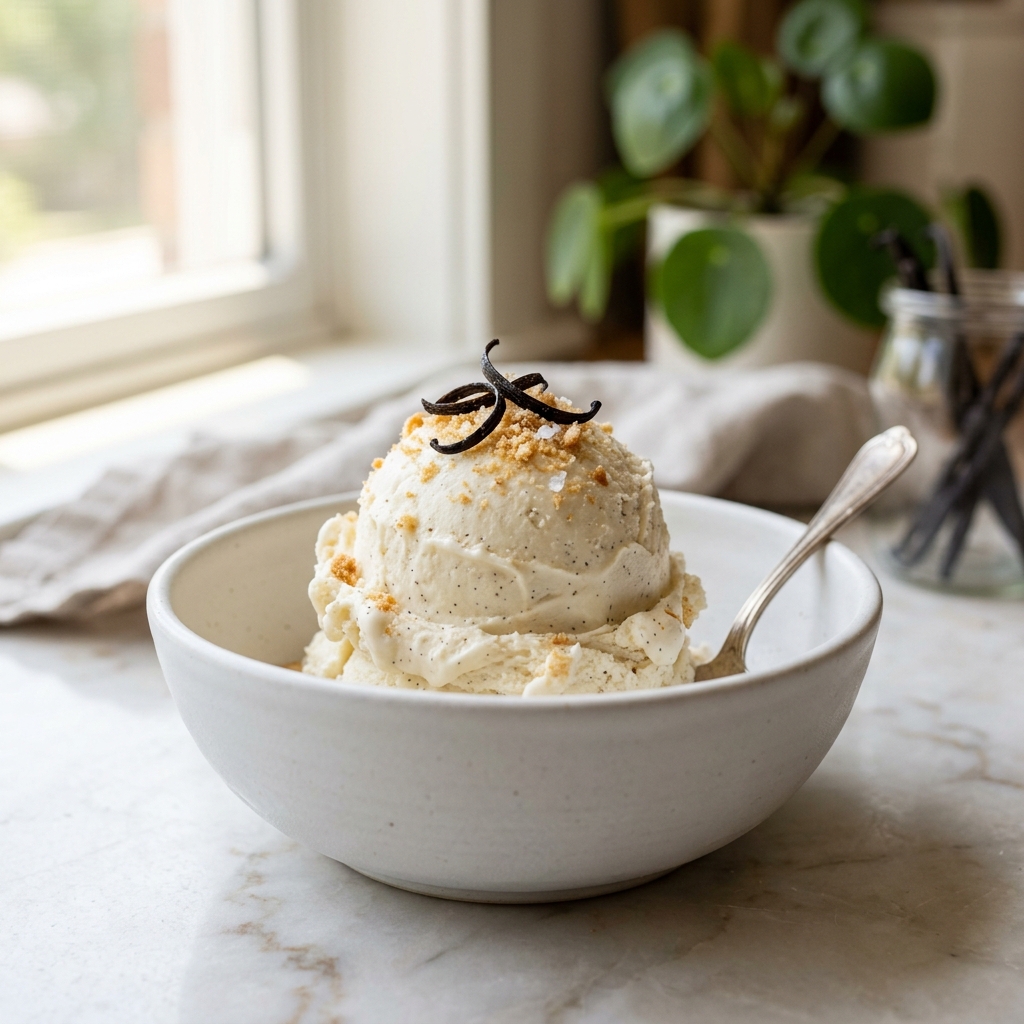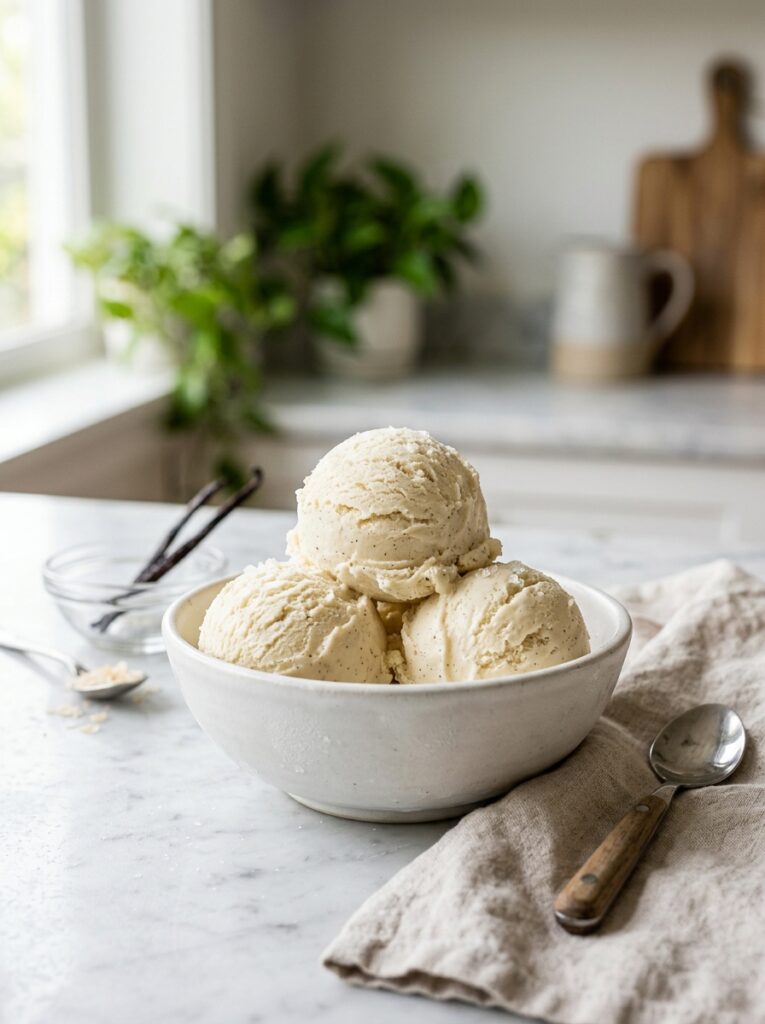
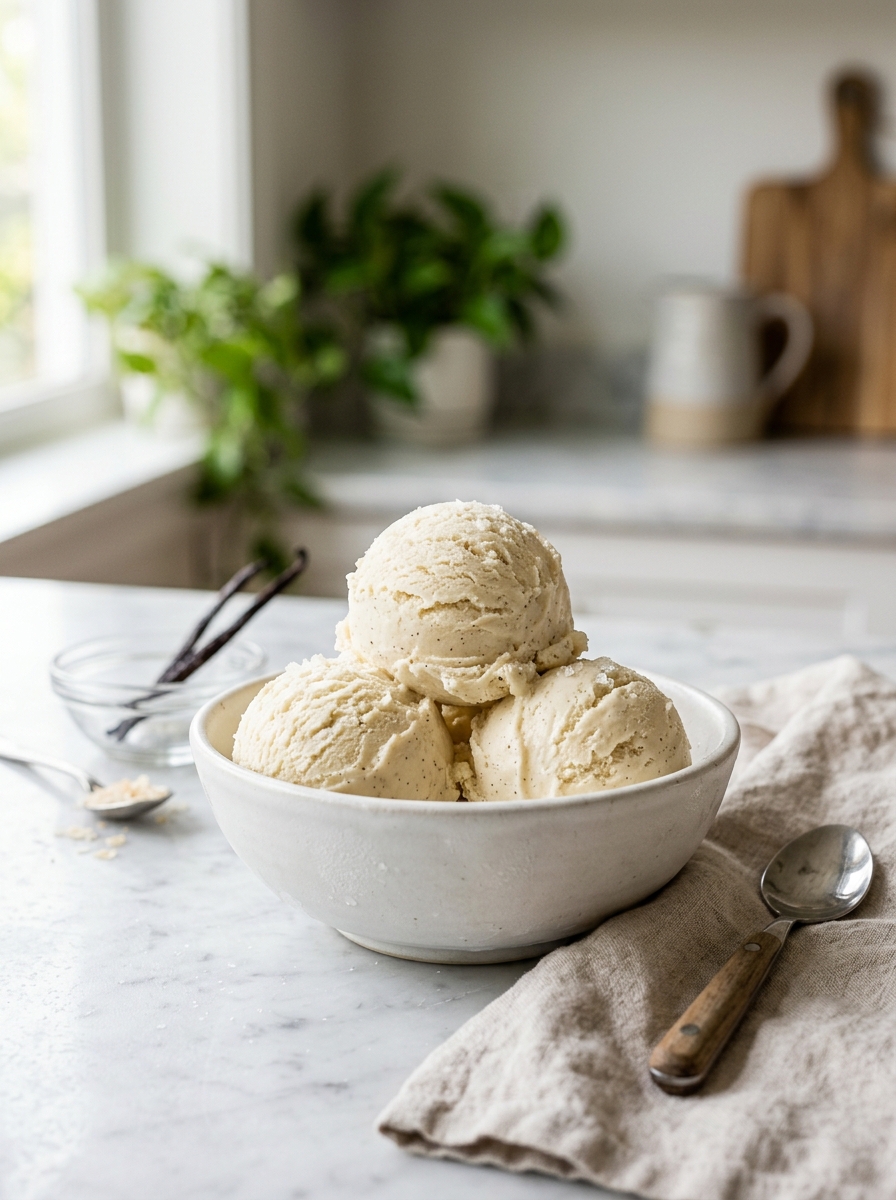
Ice cream has long been one of life’s simplest pleasures. A creamy scoop of vanilla ice cream on a warm afternoon can instantly bring comfort, nostalgia, and satisfaction. Unfortunately, traditional ice cream recipes are often loaded with sugar, making them less suitable for adults who are trying to reduce their sugar consumption or maintain healthier eating habits.
The good news is that enjoying ice cream does not have to mean giving up your wellness goals. With the right ingredients and techniques, you can create a rich, smooth, and incredibly satisfying vanilla ice cream that contains significantly less sugar while still delivering the flavor and texture you love. This recipe is designed specifically for adults who want to enjoy dessert mindfully without feeling deprived.
Whether you’re monitoring your sugar intake, following a balanced lifestyle, or simply looking for healthier dessert alternatives, this low-sugar vanilla ice cream recipe proves that healthier choices can still be indulgent. Every spoonful offers creamy vanilla goodness with a luxurious texture that rivals many store-bought varieties.
Why This Recipe Might Surprise You
Many people assume that reducing sugar automatically means sacrificing flavor. That belief often comes from disappointing experiences with bland “diet” desserts that fail to satisfy cravings. However, vanilla ice cream is unique because its flavor relies heavily on high-quality dairy and aromatic vanilla rather than sugar alone.
When properly prepared, a low-sugar vanilla ice cream allows the natural richness of cream and milk to shine through. Instead of overwhelming sweetness masking every other flavor, you’ll notice subtle notes of vanilla bean, buttery dairy richness, and a clean finish that feels refreshing rather than heavy.
Another surprising benefit is how this recipe can help you appreciate dessert differently. Traditional ice cream often encourages overeating because intense sweetness can temporarily dull satisfaction signals. A thoughtfully sweetened ice cream provides enjoyment while helping you feel content with a reasonable serving size.
Perhaps most importantly, making your own low-sugar ice cream gives you complete control over the ingredients. You decide the sweetness level, the quality of dairy products, and whether to use natural sweeteners that align with your dietary preferences. The result is a dessert that fits your lifestyle rather than forcing your lifestyle to fit the dessert.
What Makes This Low-Sugar Vanilla Ice Cream Special?
It Delivers Real Vanilla Flavor
Many commercial ice creams rely heavily on sugar to create flavor impact. In this recipe, premium vanilla extract and vanilla bean provide authentic vanilla notes that stand out beautifully.
It Has a Smooth, Creamy Texture
One of the biggest concerns when reducing sugar is texture. Sugar plays a role in preventing ice cream from becoming rock hard. This recipe balances ingredients carefully to create a scoopable texture while keeping sugar levels lower than traditional versions.
It Uses Simple Ingredients
You won’t need complicated ingredients or specialty products. Most of the ingredients are commonly found in grocery stores, making this recipe practical for everyday home cooks.
It’s Customizable
The sweetness level can be adjusted to suit your personal preferences. Whether you prefer barely sweet desserts or something closer to traditional ice cream, this recipe can be adapted accordingly.
Ingredients for Low-Sugar Vanilla Ice Cream
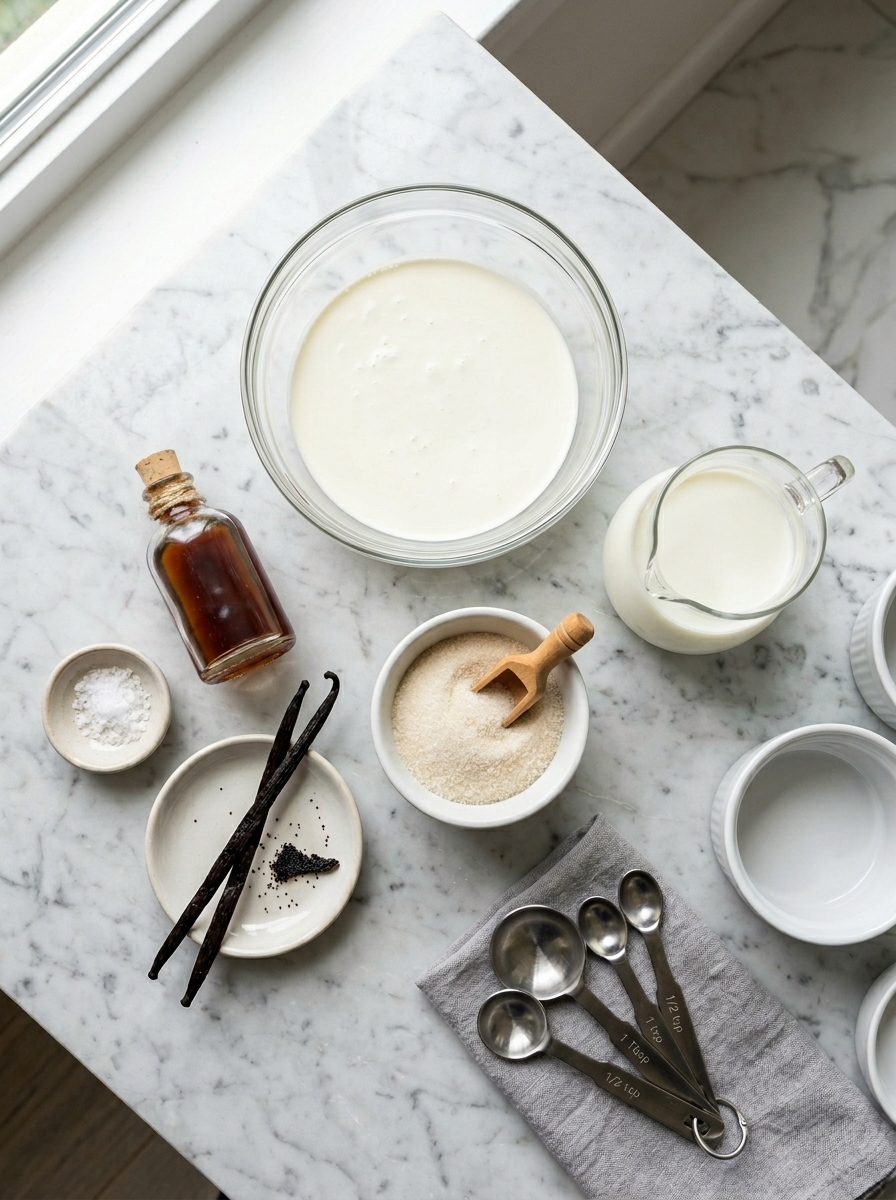
Heavy Cream – 2 Cups
Heavy cream forms the foundation of luxurious ice cream. Its high fat content creates the smooth texture that makes every scoop feel rich and satisfying.
When shopping, choose fresh heavy cream with a fat content of at least 36% for the best results.
Whole Milk – 1 Cup
Whole milk adds balance and prevents the ice cream from becoming overly rich. It contributes to creaminess while helping maintain a lighter texture.
Avoid using skim milk because it may result in an icy final product.
Low-Sugar Sweetener – ½ to ¾ Cup
Choose a sweetener designed for baking and frozen desserts. Popular options include:
- Monk fruit sweetener
- Erythritol blends
- Allulose
- Stevia blends formulated for baking
Different sweeteners vary in sweetness levels, so always follow package recommendations.
Pure Vanilla Extract – 2 Teaspoons
Pure vanilla extract provides deep vanilla flavor that elevates the entire recipe.
Avoid imitation vanilla if possible. Pure vanilla creates a more sophisticated and authentic taste.
Vanilla Bean – 1 Pod (Optional)
A vanilla bean adds beautiful specks throughout the ice cream and provides exceptional flavor depth.
While optional, it significantly enhances the finished dessert.
Egg Yolks – 4 Large
Egg yolks create a custard base that contributes richness, creaminess, and stability.
They also help improve texture and reduce iciness.
Pinch of Salt
A small amount of salt enhances sweetness perception and balances flavors.
Do not skip this ingredient. Even a tiny pinch makes a noticeable difference.
Choosing the Best Sweetener
One of the most important decisions in this recipe is selecting the right sweetener. Not all sugar substitutes behave the same way in frozen desserts.
Allulose
Many ice cream enthusiasts consider allulose one of the best options for homemade low-sugar ice cream. It helps maintain softness and reduces the icy texture that can occur with other sweeteners.
Advantages include:
- Smooth texture
- Mild sweetness
- Excellent freezing properties
- Minimal aftertaste
Monk Fruit Blends
Monk fruit blends offer a natural alternative and often provide sweetness very similar to sugar.
Advantages include:
- Pleasant flavor
- Easy availability
- Suitable for many dietary lifestyles
Erythritol
Erythritol is commonly used in low-sugar desserts, though it can sometimes create a cooling sensation in frozen treats.
Advantages include:
- Low calorie content
- Widely available
- Reliable sweetness
Stevia Blends
Stevia can work well when combined with other sweeteners.
Advantages include:
- Very sweet
- Requires smaller quantities
- Suitable for sugar-conscious recipes
Step-by-Step Preparation Guide
Step 1: Prepare the Vanilla
If using a vanilla bean, carefully split it lengthwise using a sharp knife.
Scrape out the tiny seeds and place both the seeds and pod into a saucepan.
These seeds contain concentrated vanilla flavor that will infuse the ice cream base.
Step 2: Heat the Dairy
Add the following ingredients to a medium saucepan:
- Heavy cream
- Whole milk
- Vanilla bean seeds and pod
Heat over medium-low heat until the mixture becomes hot but not boiling.
Stir occasionally to prevent scorching.
This gentle heating process allows the vanilla flavor to infuse throughout the dairy mixture.
Step 3: Whisk the Egg Yolks
In a separate mixing bowl, combine:
- Egg yolks
- Low-sugar sweetener
- Pinch of salt
Whisk thoroughly until the mixture becomes lighter in color and slightly thickened.
This step helps create a smooth custard base.
Step 4: Temper the Eggs
Tempering is essential for preventing scrambled eggs.
Slowly pour a small amount of the hot cream mixture into the egg yolk mixture while whisking continuously.
Continue adding the hot liquid gradually until about half of the dairy mixture has been incorporated.
The eggs will gently warm without cooking too quickly.
Step 5: Cook the Custard
Return everything to the saucepan.
Cook over medium-low heat while stirring constantly with a wooden spoon or silicone spatula.
Continue cooking until the custard thickens enough to coat the back of a spoon.
Do not allow the mixture to boil.
Overheating can cause curdling and negatively affect the final texture.
Step 6: Strain the Mixture
Remove the saucepan from the heat.
Pour the custard through a fine-mesh strainer into a clean bowl.
This step removes any accidental lumps and creates a silky-smooth base.
Step 7: Add Vanilla Extract
Stir in the pure vanilla extract while the mixture is still warm.
The warmth helps distribute the vanilla flavor evenly throughout the custard.
Step 8: Chill Thoroughly
Cover the bowl and refrigerate for at least four hours.
For best results, chill overnight.
A properly chilled base churns more effectively and develops superior texture.
Step 9: Churn the Ice Cream
Once the ice cream base is thoroughly chilled, remove it from the refrigerator and give it a quick stir.
If you have an ice cream maker, pour the chilled mixture into the machine and churn according to the manufacturer’s instructions. Most machines will take approximately 20 to 30 minutes to transform the custard into a soft-serve consistency.
During this process, air is incorporated into the mixture, creating the creamy texture associated with premium ice cream. Avoid over-churning, as this can negatively affect the final texture.
If you do not own an ice cream maker, don’t worry. You can still make this recipe successfully. Pour the chilled mixture into a freezer-safe container and place it in the freezer. Every 30 to 45 minutes, stir vigorously with a fork or whisk to break up ice crystals. Repeat this process several times until the mixture becomes thick and creamy.
Step 10: Freeze Until Firm
Transfer the churned ice cream to an airtight freezer-safe container.
Smooth the top with a spatula and press a sheet of parchment paper directly onto the surface of the ice cream. This helps prevent ice crystals from forming.
Freeze for 3 to 4 hours, or until the ice cream reaches your preferred consistency.
Low-sugar ice cream may freeze differently than traditional ice cream, so allow it to sit at room temperature for a few minutes before scooping if needed.
Delicious Variations of This Recipe
One of the best things about homemade vanilla ice cream is how easily it can be customized. Once you’ve mastered the basic recipe, try some of these flavorful variations.
Vanilla Bean Almond Ice Cream
Add:
- ½ cup chopped roasted almonds
- Extra vanilla bean seeds
The almonds add crunch while complementing the creamy vanilla flavor.
Cinnamon Vanilla Ice Cream
Add:
- 1 teaspoon ground cinnamon
This creates a warm, comforting dessert that tastes wonderful during cooler months.
Strawberry Vanilla Ice Cream
Fold in:
- 1 cup finely chopped fresh strawberries
The fruit adds natural sweetness and beautiful color without significantly increasing sugar content.
Chocolate Chip Vanilla Ice Cream
Add:
- ½ cup sugar-free dark chocolate chips
This variation delivers classic ice cream shop flavor with less sugar.
Coffee Vanilla Ice Cream
Add:
- 1 tablespoon instant espresso powder
The coffee enhances the vanilla and creates a sophisticated flavor profile perfect for adults.
Coconut Vanilla Ice Cream
Replace part of the milk with unsweetened coconut milk for a tropical twist and added richness.
Maple Vanilla Ice Cream
Use a small amount of pure maple syrup combined with your preferred sweetener for a deeper flavor profile.
Expert Tips for the Best Low-Sugar Ice Cream
Use High-Quality Vanilla
Since vanilla is the star ingredient, quality matters.
Pure vanilla extract and real vanilla beans provide complexity and depth that imitation vanilla simply cannot match.
Chill the Base Overnight
While four hours is sufficient, an overnight chill produces noticeably better results.
The flavors meld together, and the colder mixture churns more efficiently.
Don’t Skip the Custard Method
Some ice cream recipes eliminate egg yolks, but the custard base provides superior creaminess and richness.
For adults seeking a premium dessert experience, the extra step is worth the effort.
Avoid Over-Sweetening
Many people transitioning to low-sugar desserts instinctively add extra sweetener.
Give your palate time to adjust. You’ll often find that less sweetness allows the vanilla flavor to shine more clearly.
Store in a Shallow Container
Shallow containers freeze more evenly than deep containers.
This helps maintain a smoother texture throughout the batch.
Let It Rest Before Scooping
Because this recipe contains less sugar than traditional ice cream, it may freeze firmer.
Allow it to sit on the counter for 5 to 10 minutes before serving for easier scooping.
Keep Air Exposure to a Minimum
Every time the container is opened, air enters and can encourage ice crystal formation.
Keep the container tightly sealed when not in use.
Make Ahead Options
This recipe is excellent for preparing in advance.
Prepare the Custard Early
The custard base can be made up to 48 hours before churning.
Store it in a covered container in the refrigerator until you’re ready to churn.
Freeze for Future Desserts
The finished ice cream can be stored for several weeks, making it convenient for entertaining or satisfying future dessert cravings.
Portion Individual Servings
Freeze individual portions in small containers for easy grab-and-go treats.
This can also help with portion control for those carefully monitoring their sugar intake.
What to Serve with Low-Sugar Vanilla Ice Cream
Although this ice cream is delicious on its own, pairing it with complementary foods can create an even more satisfying dessert experience.
Fresh Berries
Fresh strawberries, blueberries, raspberries, and blackberries add natural sweetness and vibrant color.
Roasted Nuts
Almonds, pecans, walnuts, and pistachios provide crunch and healthy fats.
Sugar-Free Chocolate Drizzle
A small amount of melted sugar-free dark chocolate creates an elegant finishing touch.
Grilled Peaches
Warm grilled peaches paired with cold vanilla ice cream create a beautiful contrast of temperatures and textures.
Homemade Berry Compote
A naturally sweetened berry compote adds flavor without excessive sugar.
Low-Sugar Cookies
Serve alongside almond flour cookies or sugar-conscious shortbread for a complete dessert plate.
Espresso or Coffee
A shot of espresso poured over vanilla ice cream creates a simple affogato-style dessert perfect for adults.
How to Store Low-Sugar Vanilla Ice Cream
Proper storage is essential for maintaining quality and texture.
In the Freezer
Store the ice cream in an airtight container at 0°F (-18°C) or below.
Properly stored ice cream typically remains at its best for 2 to 4 weeks.
Prevent Ice Crystals
Place parchment paper or plastic wrap directly against the surface before sealing the container.
This reduces air exposure and helps preserve texture.
Avoid Frequent Temperature Changes
Repeated thawing and refreezing can lead to icy texture and reduced quality.
Remove only the amount you plan to serve.
Label the Container
Include the preparation date so you can track freshness.
Frequently Asked Questions
Can I Make This Recipe Without an Ice Cream Maker?
Yes. While an ice cream maker creates the smoothest texture, the freeze-and-stir method works well for home cooks without specialized equipment.
Is This Ice Cream Suitable for People Watching Their Sugar Intake?
This recipe is specifically designed to reduce sugar content compared to traditional vanilla ice cream. However, individual dietary needs vary, so always review ingredient choices and nutritional information carefully.
Which Sweetener Works Best?
Many people prefer allulose because it helps maintain a softer texture. Monk fruit blends are also popular for their pleasant taste and accessibility.
Why Is My Ice Cream Harder Than Store-Bought Ice Cream?
Traditional ice cream contains significant amounts of sugar, which affects freezing behavior. Lower-sugar versions naturally freeze firmer and often benefit from a few minutes at room temperature before serving.
Can I Use Half-and-Half Instead of Heavy Cream?
You can, but the final product may be less creamy and more prone to ice crystal formation.
Can I Add Fruit?
Absolutely. Fresh strawberries, blueberries, raspberries, peaches, and cherries are excellent additions.
How Long Does Homemade Ice Cream Last?
For the best flavor and texture, enjoy it within 2 to 4 weeks of preparation.
Can I Reduce the Sweetener Even Further?
Yes. One of the advantages of homemade ice cream is complete control over sweetness levels. Adjust gradually to suit your preferences.
Does Homemade Low-Sugar Ice Cream Taste Different?
It does, but often in a positive way. Many adults appreciate being able to taste the rich dairy and authentic vanilla flavor without overwhelming sweetness.
Conclusion
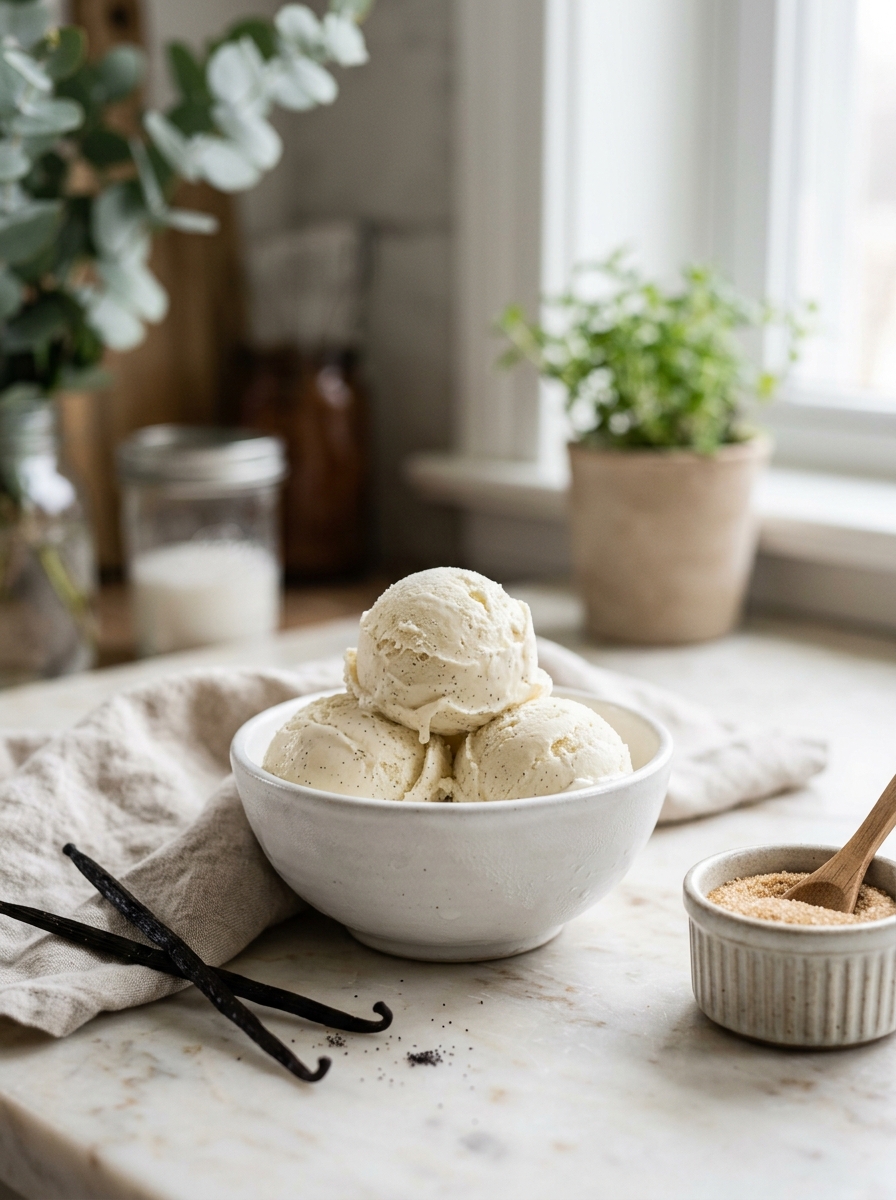
Low-Sugar Vanilla Ice Cream for Adults Managing Sugar Intake proves that dessert can still be indulgent, creamy, and deeply satisfying while aligning with healthier eating goals. By focusing on quality ingredients, real vanilla flavor, and thoughtful preparation techniques, this recipe delivers everything people love about classic vanilla ice cream with less reliance on sugar.
Whether you’re making it for yourself, serving it to family members, or offering a healthier dessert option at gatherings, this homemade ice cream demonstrates that balance and enjoyment can absolutely coexist. With its rich texture, customizable sweetness, and endless variation possibilities, it may quickly become one of your favorite homemade frozen treats.
The next time a craving for ice cream strikes, skip the overly sweet store-bought options and make a batch of this creamy low-sugar vanilla ice cream. One spoonful is enough to show that healthier desserts can be every bit as delicious as their traditional counterparts.
Low-Sugar Vanilla Ice Cream for Adults Managing Sugar Intake
Ingredients
Equipment
Method
- If using a vanilla bean, split it lengthwise and scrape out the seeds. Add the seeds and pod to a medium saucepan along with the heavy cream and whole milk.
- Warm the cream and milk mixture over medium-low heat until hot but not boiling. Stir occasionally.
- In a mixing bowl, whisk together the egg yolks, sweetener, and salt until smooth and slightly lighter in color.
- Slowly pour a small amount of the hot cream mixture into the egg mixture while whisking continuously. Continue gradually adding more until about half of the hot mixture has been incorporated.
- Pour the tempered egg mixture back into the saucepan. Cook over medium-low heat, stirring constantly, until the custard thickens enough to coat the back of a spoon.
- Remove from heat and strain through a fine-mesh sieve into a clean bowl to ensure a silky-smooth texture.
- Stir in the vanilla extract while the custard is still warm.
- Cover and refrigerate for at least 4 hours or overnight until completely chilled.
- Pour the chilled custard into an ice cream maker and churn according to the manufacturer's instructions, usually 20–30 minutes.
- Transfer to an airtight freezer container. Smooth the top and freeze for 3–4 hours until firm enough to scoop.
Notes
For stronger vanilla flavor, use both vanilla extract and a whole vanilla bean.
Allow the ice cream to sit at room temperature for 5–10 minutes before scooping.
Store in an airtight container for up to 4 weeks.
To prevent ice crystals, press parchment paper directly onto the surface before sealing.
For added texture, mix in chopped nuts or sugar-free chocolate chips during the final minutes of churning.
If making without an ice cream maker, freeze the mixture and stir vigorously every 30–45 minutes until creamy.
This recipe is naturally lower in sugar than traditional vanilla ice cream but still delivers a rich, indulgent flavor.